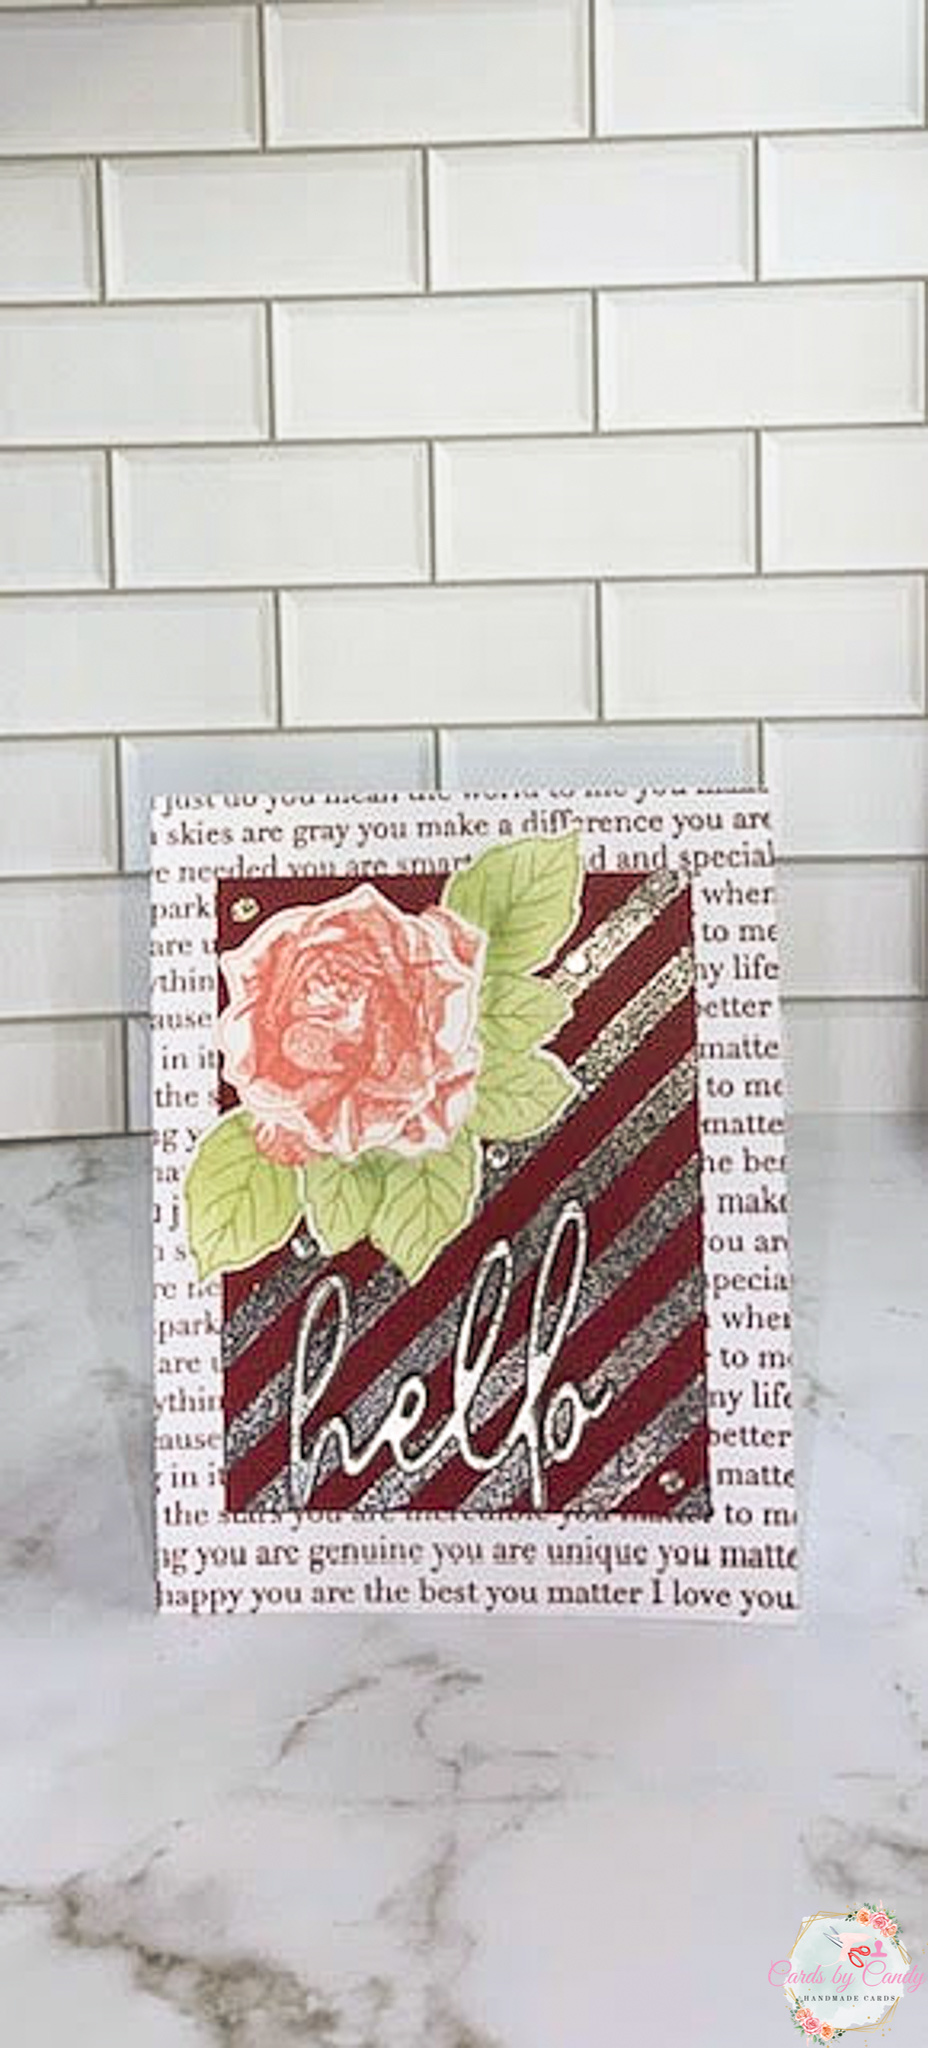
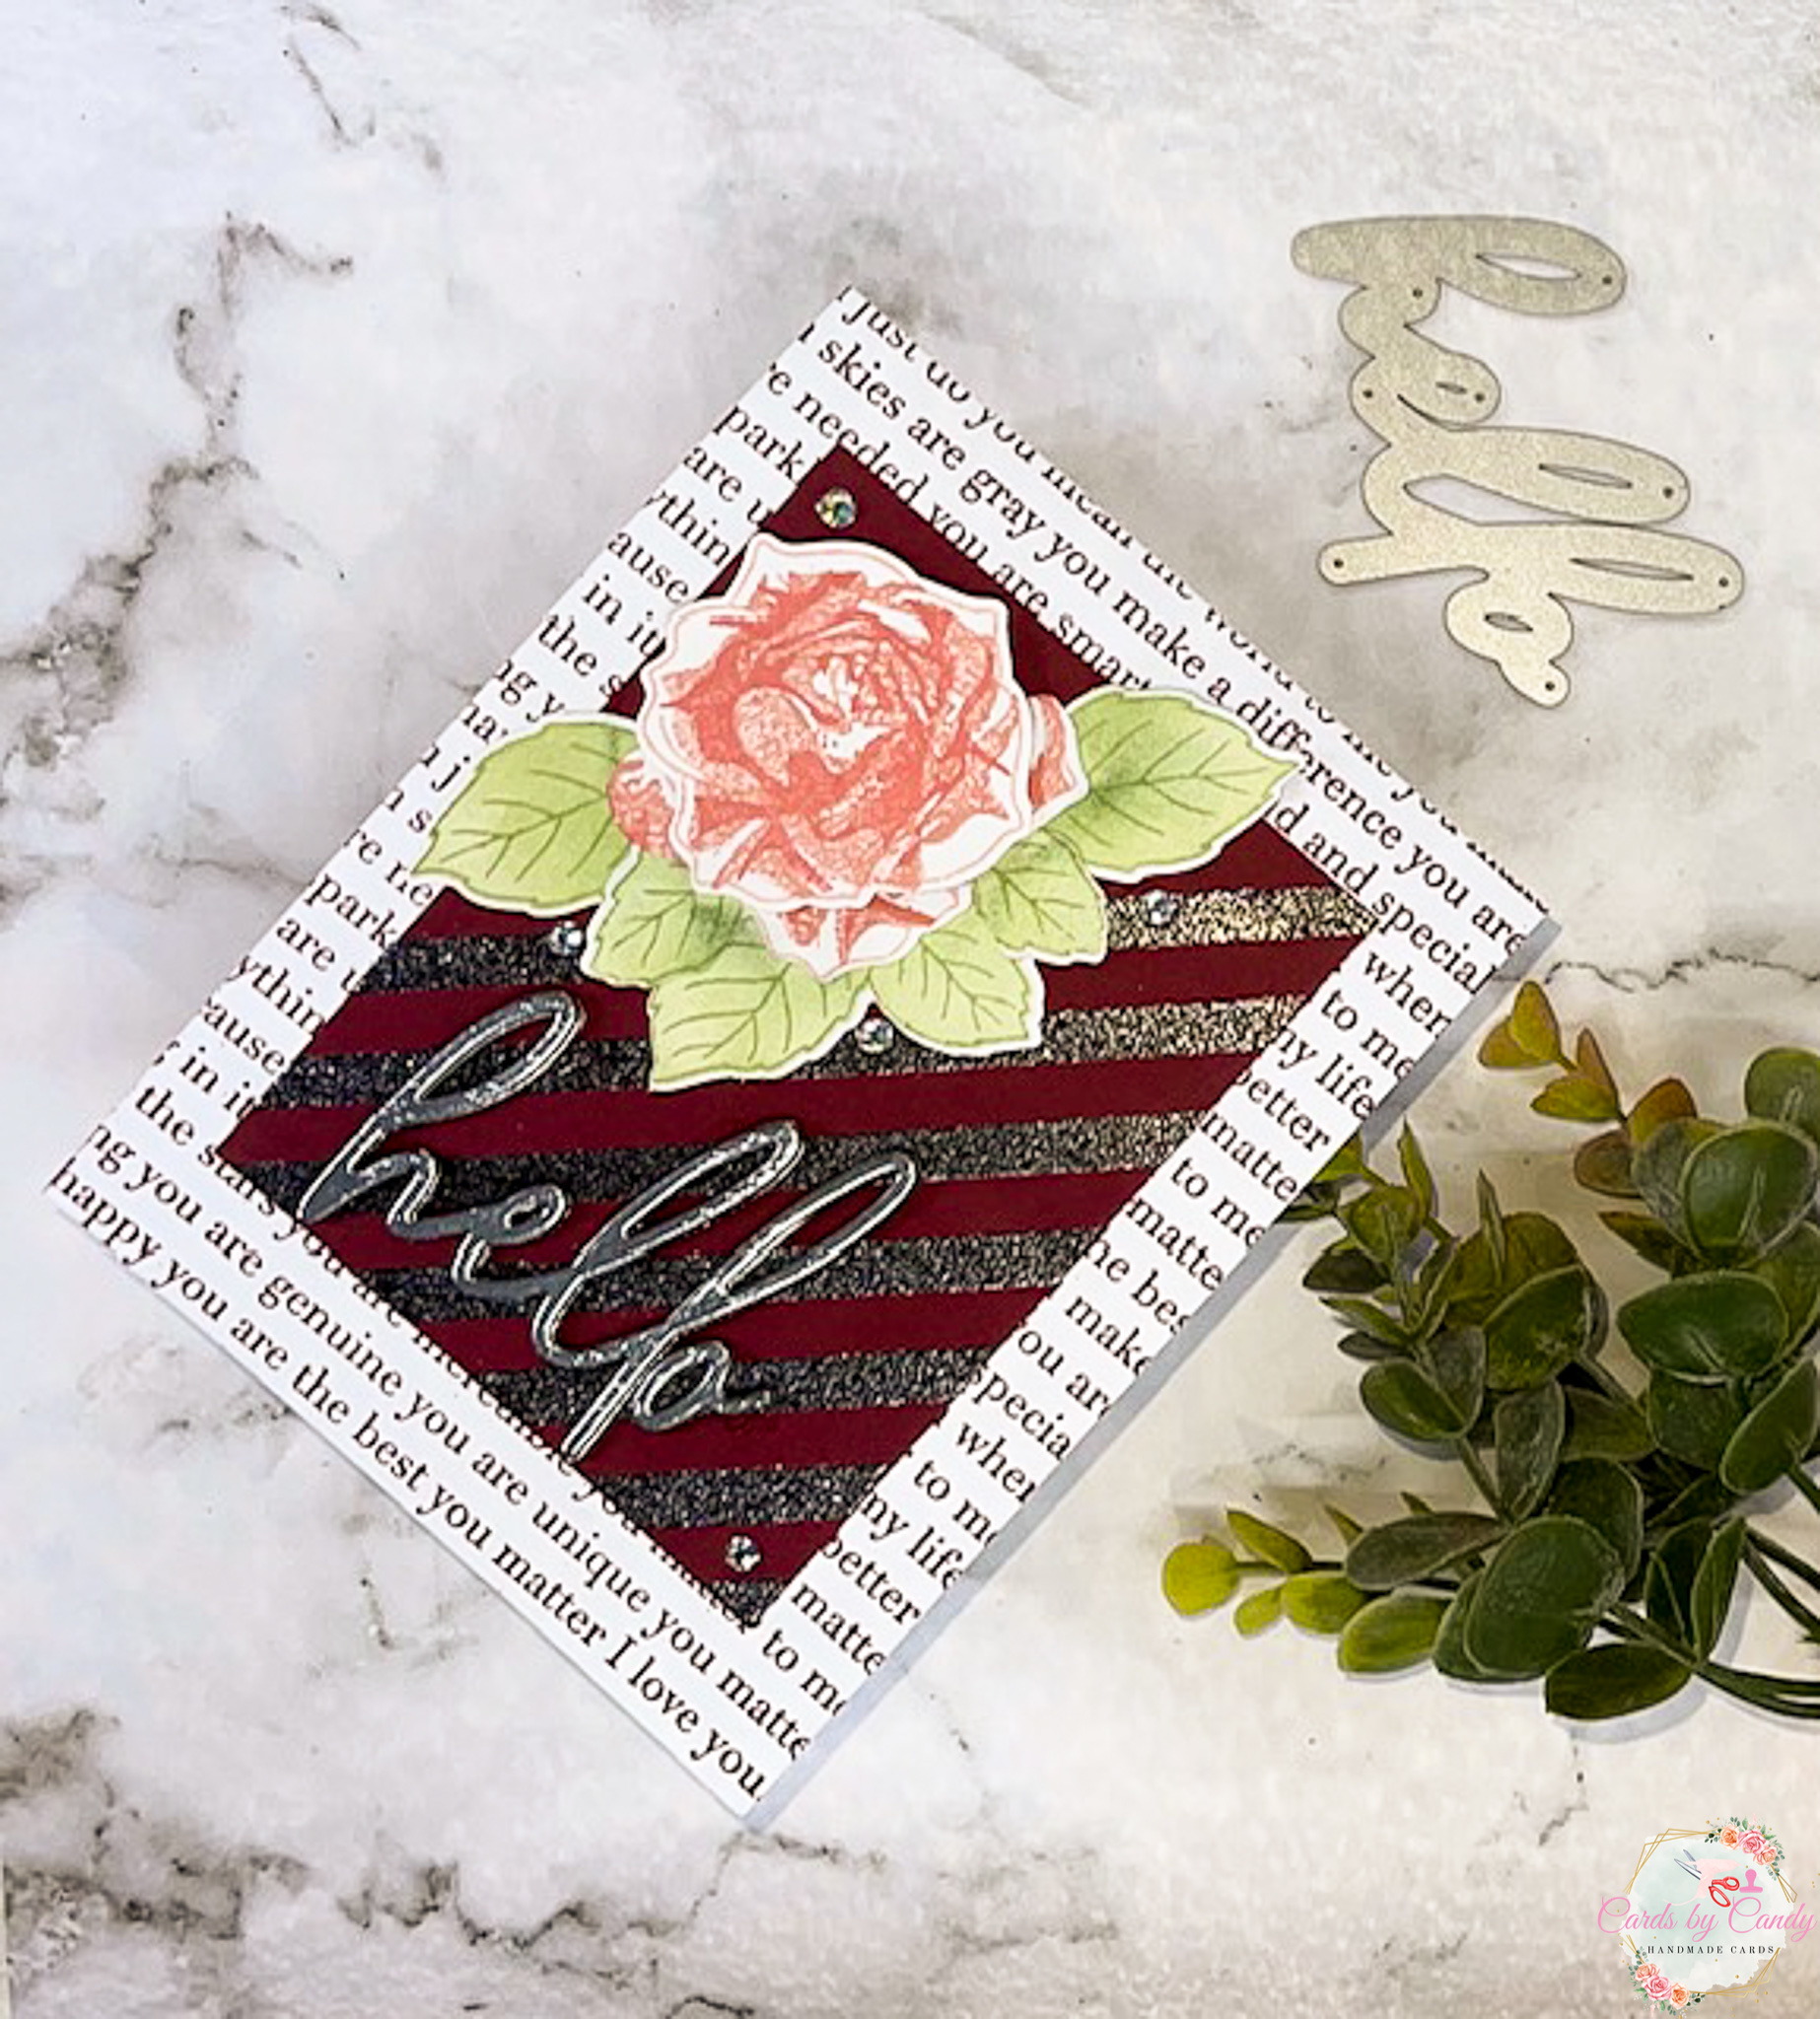
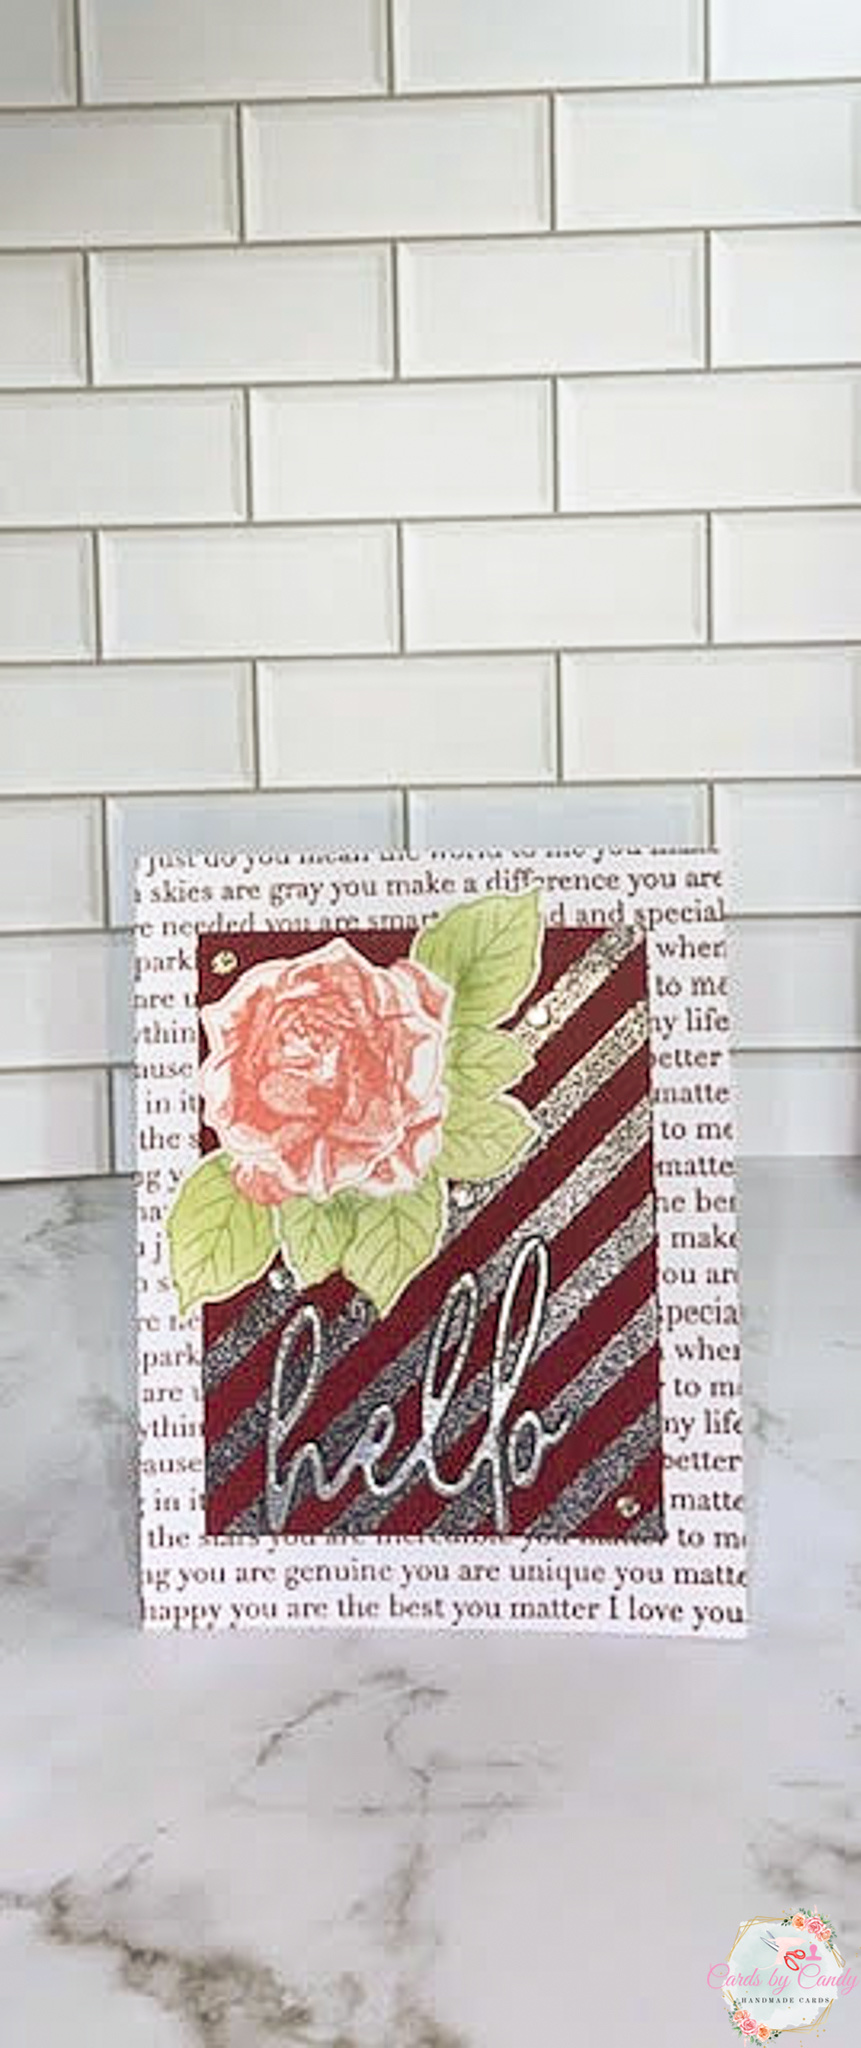
Hey y’all! Thanks for stopping by today to learn how to step-up your backgrounds for cards. This is a super easy, fast card to make when you’re in a hurry. Let’s look at how to create quick backgrounds with background stamps and stencils.
- Cut a 130lb heavyweight cardstock base to 4.25″ by 5.5″.
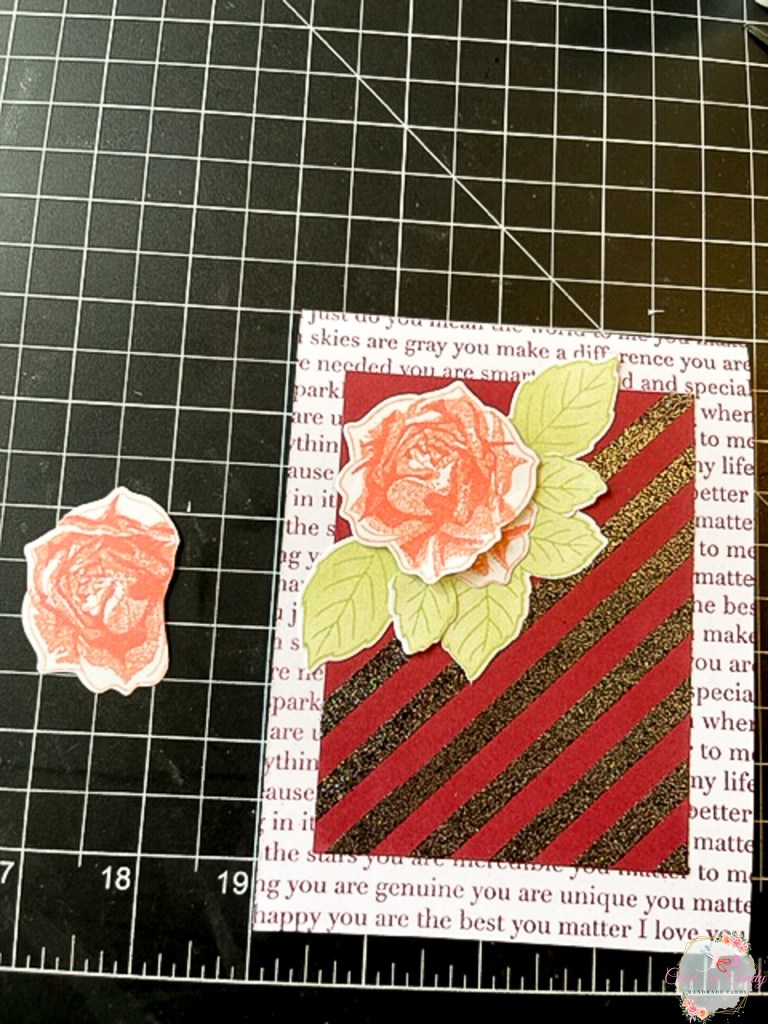
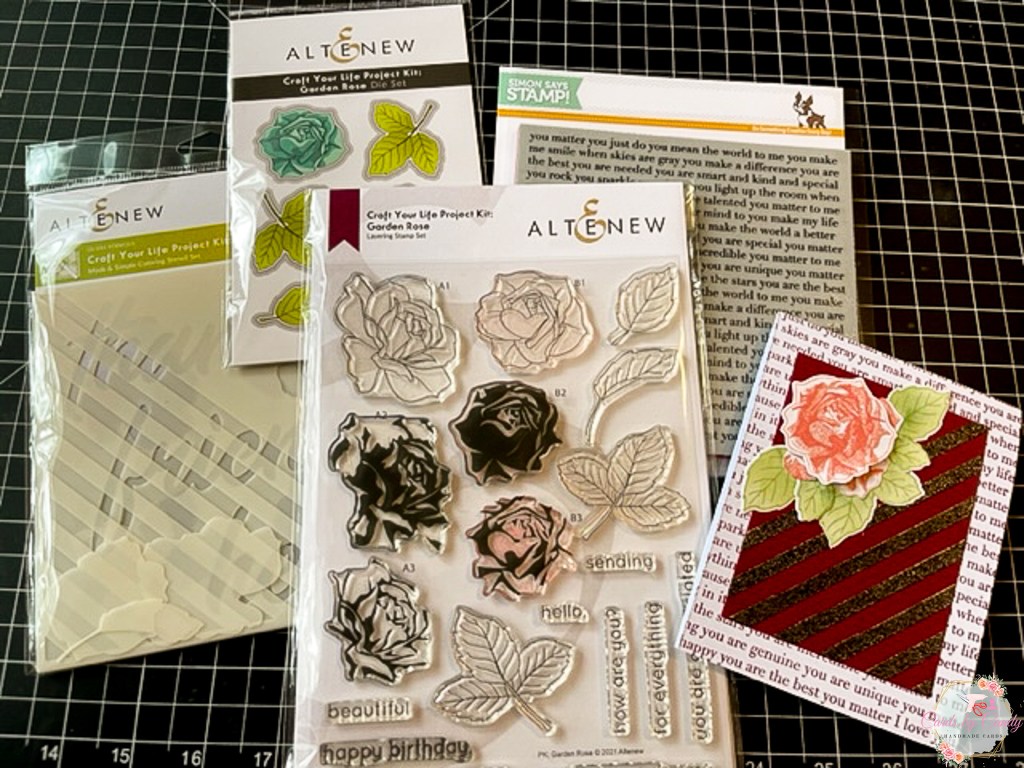
- Score and close the card to stamp the background using a word background stamp. I used the Simon Says Stamp “You Matter” background stamp. I stamped it with Stampin’ Up Cherry Cobbler ink.
- Cut a matching mat for the card to 3.75″ by 5″. I used a deep maroon color to match the background ink.
- Rub an anti-static powder over the panel.
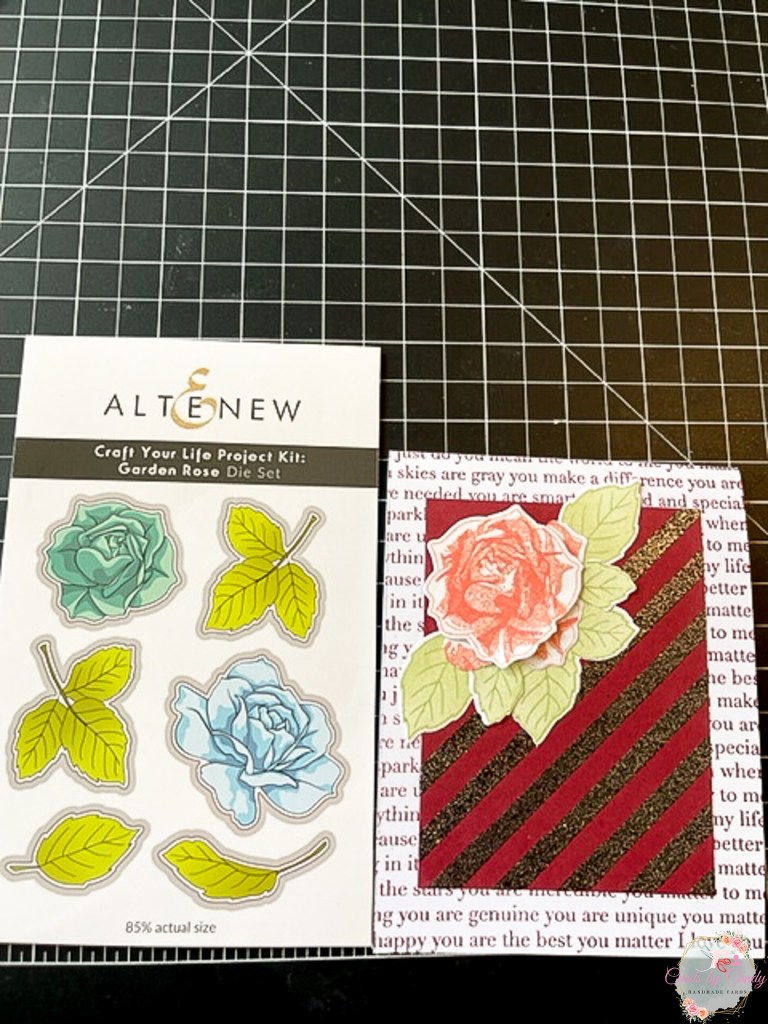
- Using the Altenew Craft Your Life: Garden Rose Stencil Set, tape the diagonal lines stencil on the mat panel.
- With a blending brush, blend Versamark Embossing Ink over the stencil.
- Remove the stencil and pour Recollections Fine Charcoal Sparkling Embossing Powder over the clear diagonal lines.
- Set the embossing powder with a heat tool and set panel to the side.
- Stamp the outline twice of the Altenew Craft Your Life: Garden Rose Stamp Set, B1 rose in Altenew Pink Pearl ink.
- On both stamps, stamp the second layer, B2 rose, in Altenew Rouge ink.
- Stamp the third layer, B3 rose, in Altenew Coral Bliss ink.
- Die cut these two roses using the Altenew Craft Your Life: Garden Rose Die Set.
- Stamp the leaves in Altenew Forest Glades ink.
- Using the coordinating stencil, fill in the color of these leaves using the same ink and an Altenew mini blending brush.
- Die cut these leaves using the coordinating die set.

The beauty about this stencil is that it purposefully leaves an open area for either stamping, a die cut, or stenciling. This stencil could also be used for the entire panel; however, I wanted to use it as intended. Now, let’s look at the next details of this easy card.
- Use dimensional foam on the back of one of the stamped rose images and place in the open area of the maroon panel.
- Place the leaves under the rose with Gina K Connect Glue.
Because I had placed the leaves a little too far apart, I had to cut down two more small leaves to fill in those gaps. Once I placed these extra leaves, it seemed too heavy with all the leaves bunched together. To break it up slightly, I cut small pieces from the extra garden rose and placed those under the main larger rose. This helped quite a bit.
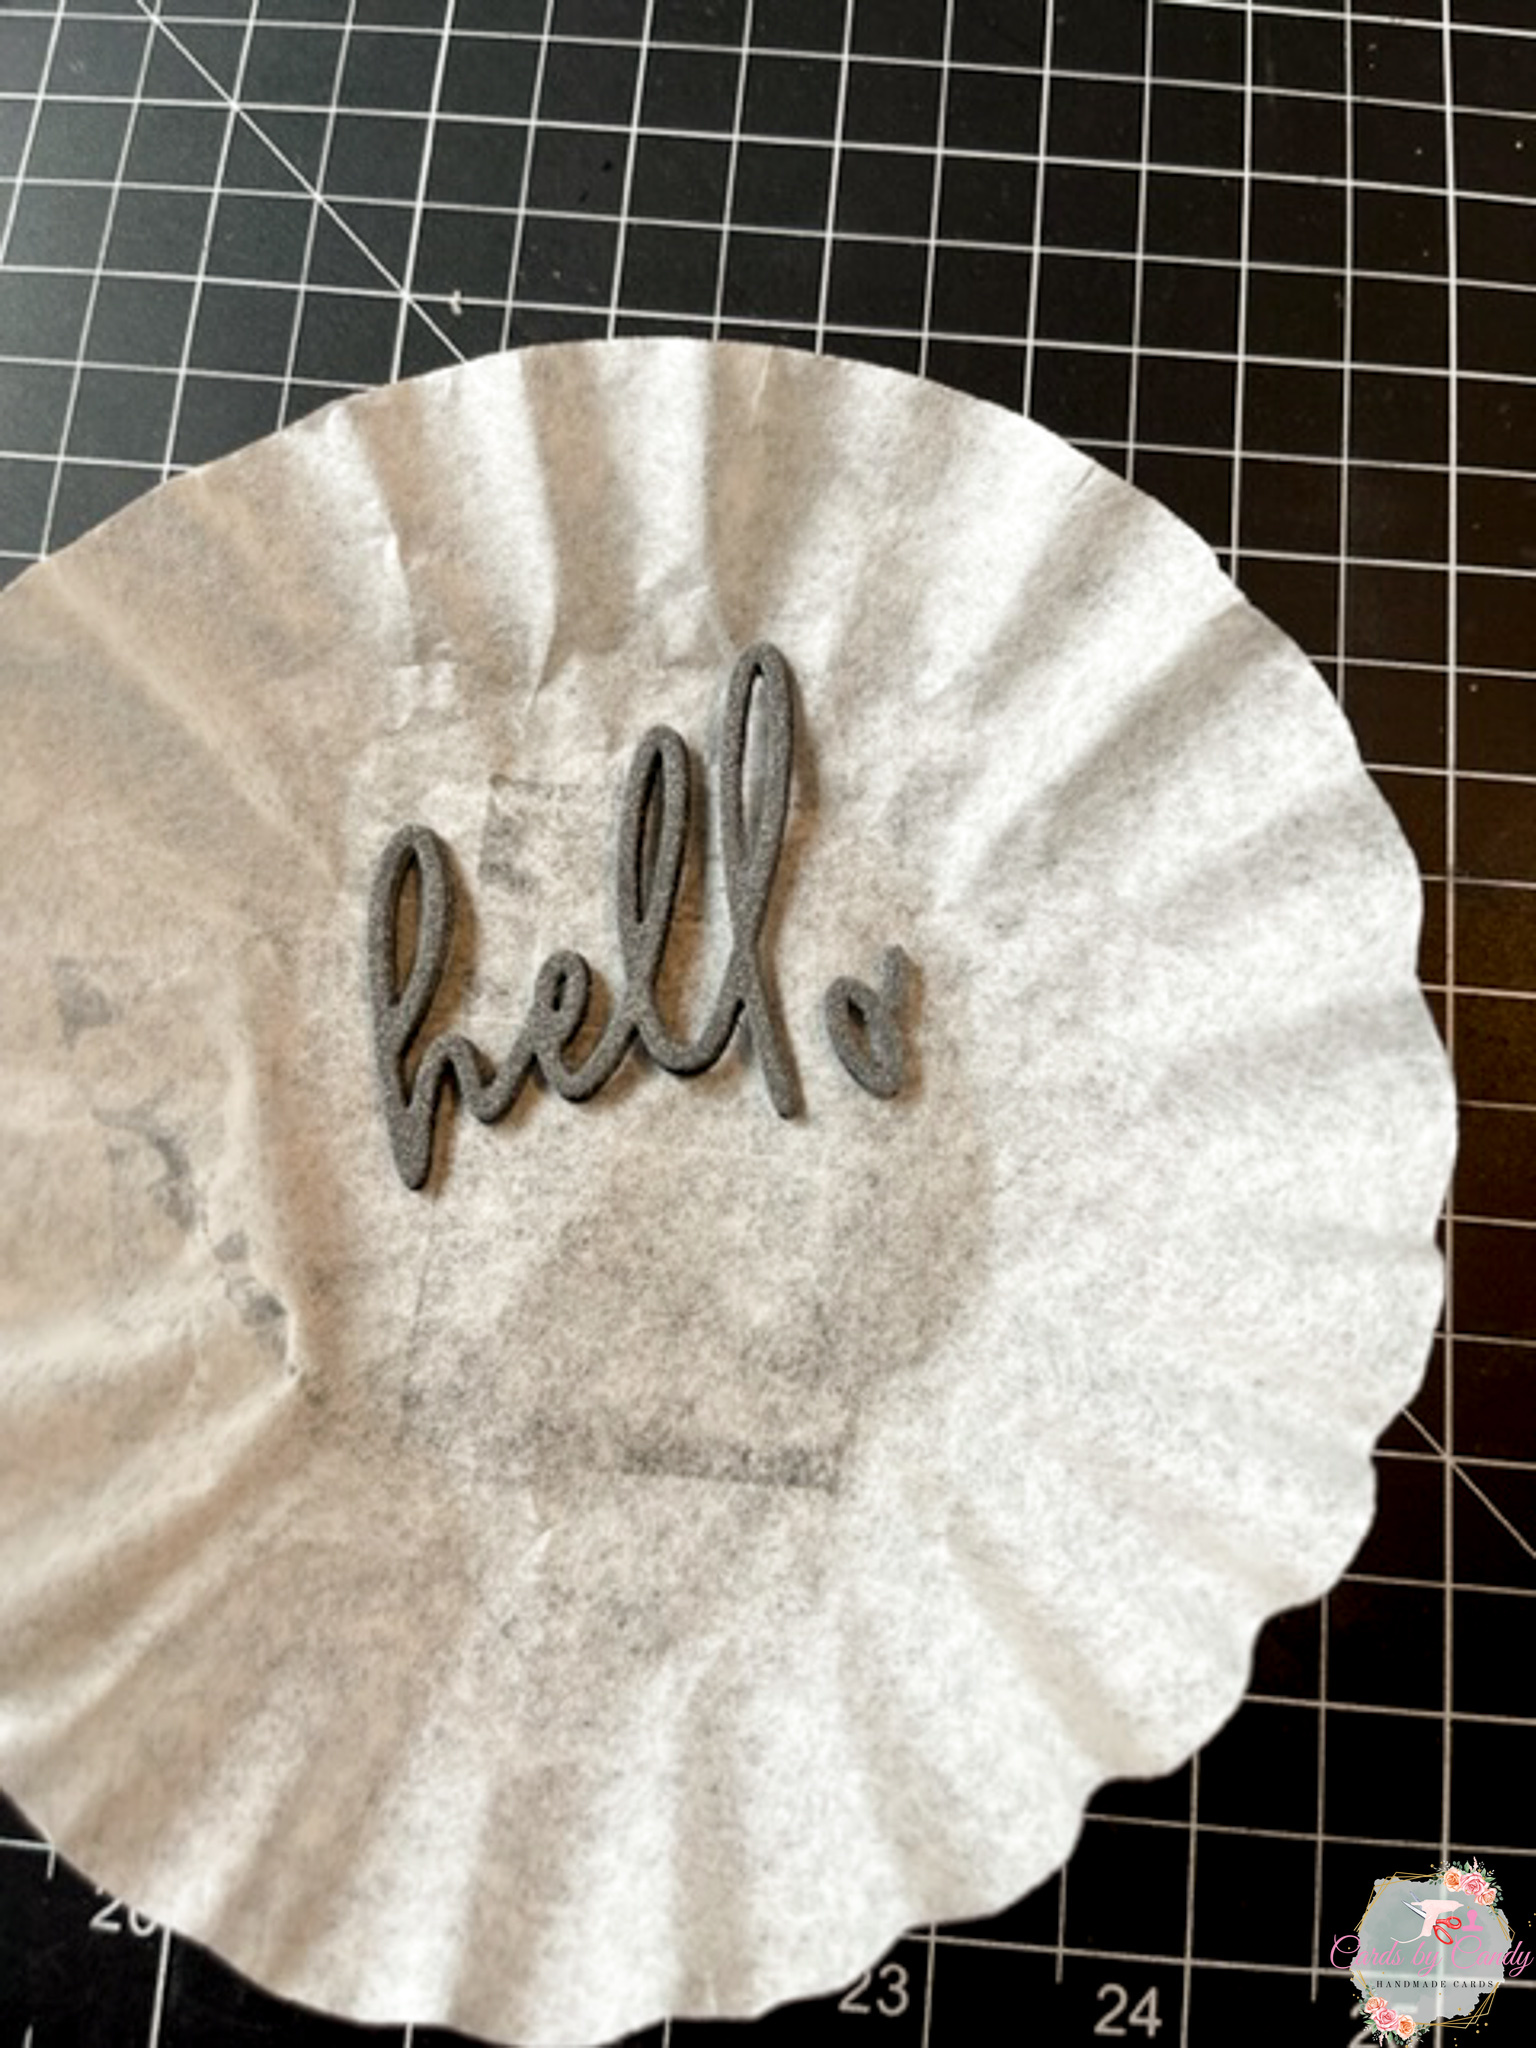
- Die cut the “hello” word die four times from the Altenew Calming Reverie Die Set in black cardstock.
- Glue each of these “hello” die cuts together.
- Rub Versamark ink over the top layer of the “hello” word die cut.
- Pour Stampin’ Up silver embossing powder over the die cut.
- Heat set it to create a shiny hello sentiment.
- Glue the sentiment to the bottom middle of the card.
- Finish the card with iridescent gems.
By adding up two backgrounds, it creates more interest with the card. While I have listed specific products used, these could easily be interchanged with whatever stamps you have on hand. Background word stamps and lines work really well for this quick trick. I’d love to see your comments about what you would use to create one of these stepped-up background cards.