

Hi there! Thanks for stopping by to see this fun, interactive card. It features a shaker window and a spinner feature for double the interaction! I learned how to create my own version of this after participating the Altenew Cards in Motion class. It was so much fun! There were many great tips and tricks to learn in each lesson. Let’s begin crafting this card!
This card was fairly simple to make even though it looks complex.
- Cut heavyweight cardstock to 5.5 inches by 10.75 inches.
- Score one side at 2 1/8 inches.
- Reinforce that score line and fold.
- Flip cardstock over, and score at 4.25 inches, then reinforce this fold line.
- Trim about 1/4 inches off the larger folded edge to make the card close nicely.
- Take a shape die to create the shaker window. This could be a square, triangle, circle, it does not matter. I chose a circle die. With the card closed, tape half of the die onto the 2 1/8 inch flap so that part is on this flap while the other part is not covering anything.
- Die cut flap.
- Close card again with die still taped down. Tape the opposite side of the die onto the opposite larger front flap. Remove the tape from the previously die cut side. Leave card open to die cut this flap.
- Next, using Altenew Tartan stamp builder, take the largest line stamp and stamp in Altenew Pink Pearl ink over the solid die cut opening of the card. Make sure to have a scrap piece of paper behind the die cut window to keep ink from getting on the inside of the card.
- Move stamp over to cross the lines and stamp in Altenew Ocean Waves ink.
- It is also useful to use the two line stamps to add extra lines if desired.
- Close card and align stamp on 2 1/8″ panel to match those on the larger panel.
- Once stamp is aligned, place scrap paper over previously stamped side and use the stamp positioner to stamp in Altenew Pink Pearl. Rotate stamp and align again to stamp in Altenew Ocean Waves ink.


Let’s start creating the shaker element of the card.
- I selected a turquoise glitter cardstock and using the same die for the window, I took it as well as a slightly larger circle die and taped those together. I die cut two rings in the turquoise glitter cardstock and then 2 more rings from thick white cardstock.
- Using the larger circle die, I die cut 2 acetate windows.
- Glue acetate to one of the turquoise glitter rings and then glue this to the inside of the front small flap.
- Add foam tape around circle. After I circled it once, I realized with the sequins I planned to use in the shaker that this needed to have an extra layer of foam tape. On top of that I added the second layer of foam tape.
- Use a dryer sheet and rub over the acetate and the inside edges of the foam tape. This will minimize static and was a nifty tip I learned from this class.
- Add sequins on top of acetate.
- Glue second acetate to one of the white cardstock rings. Then glue the other white cardstock ring on top of that. Add the final turquoise ring on top of this.
- Turn to the back side of this piece (where you do not see the glitter cardstock) and rub the dryer sheet over it as this is the side that will enclose the sequins.
- Adhere this piece on top of the foam tape.

Now, let’s work on the spinner feature of the inside flap of the card.
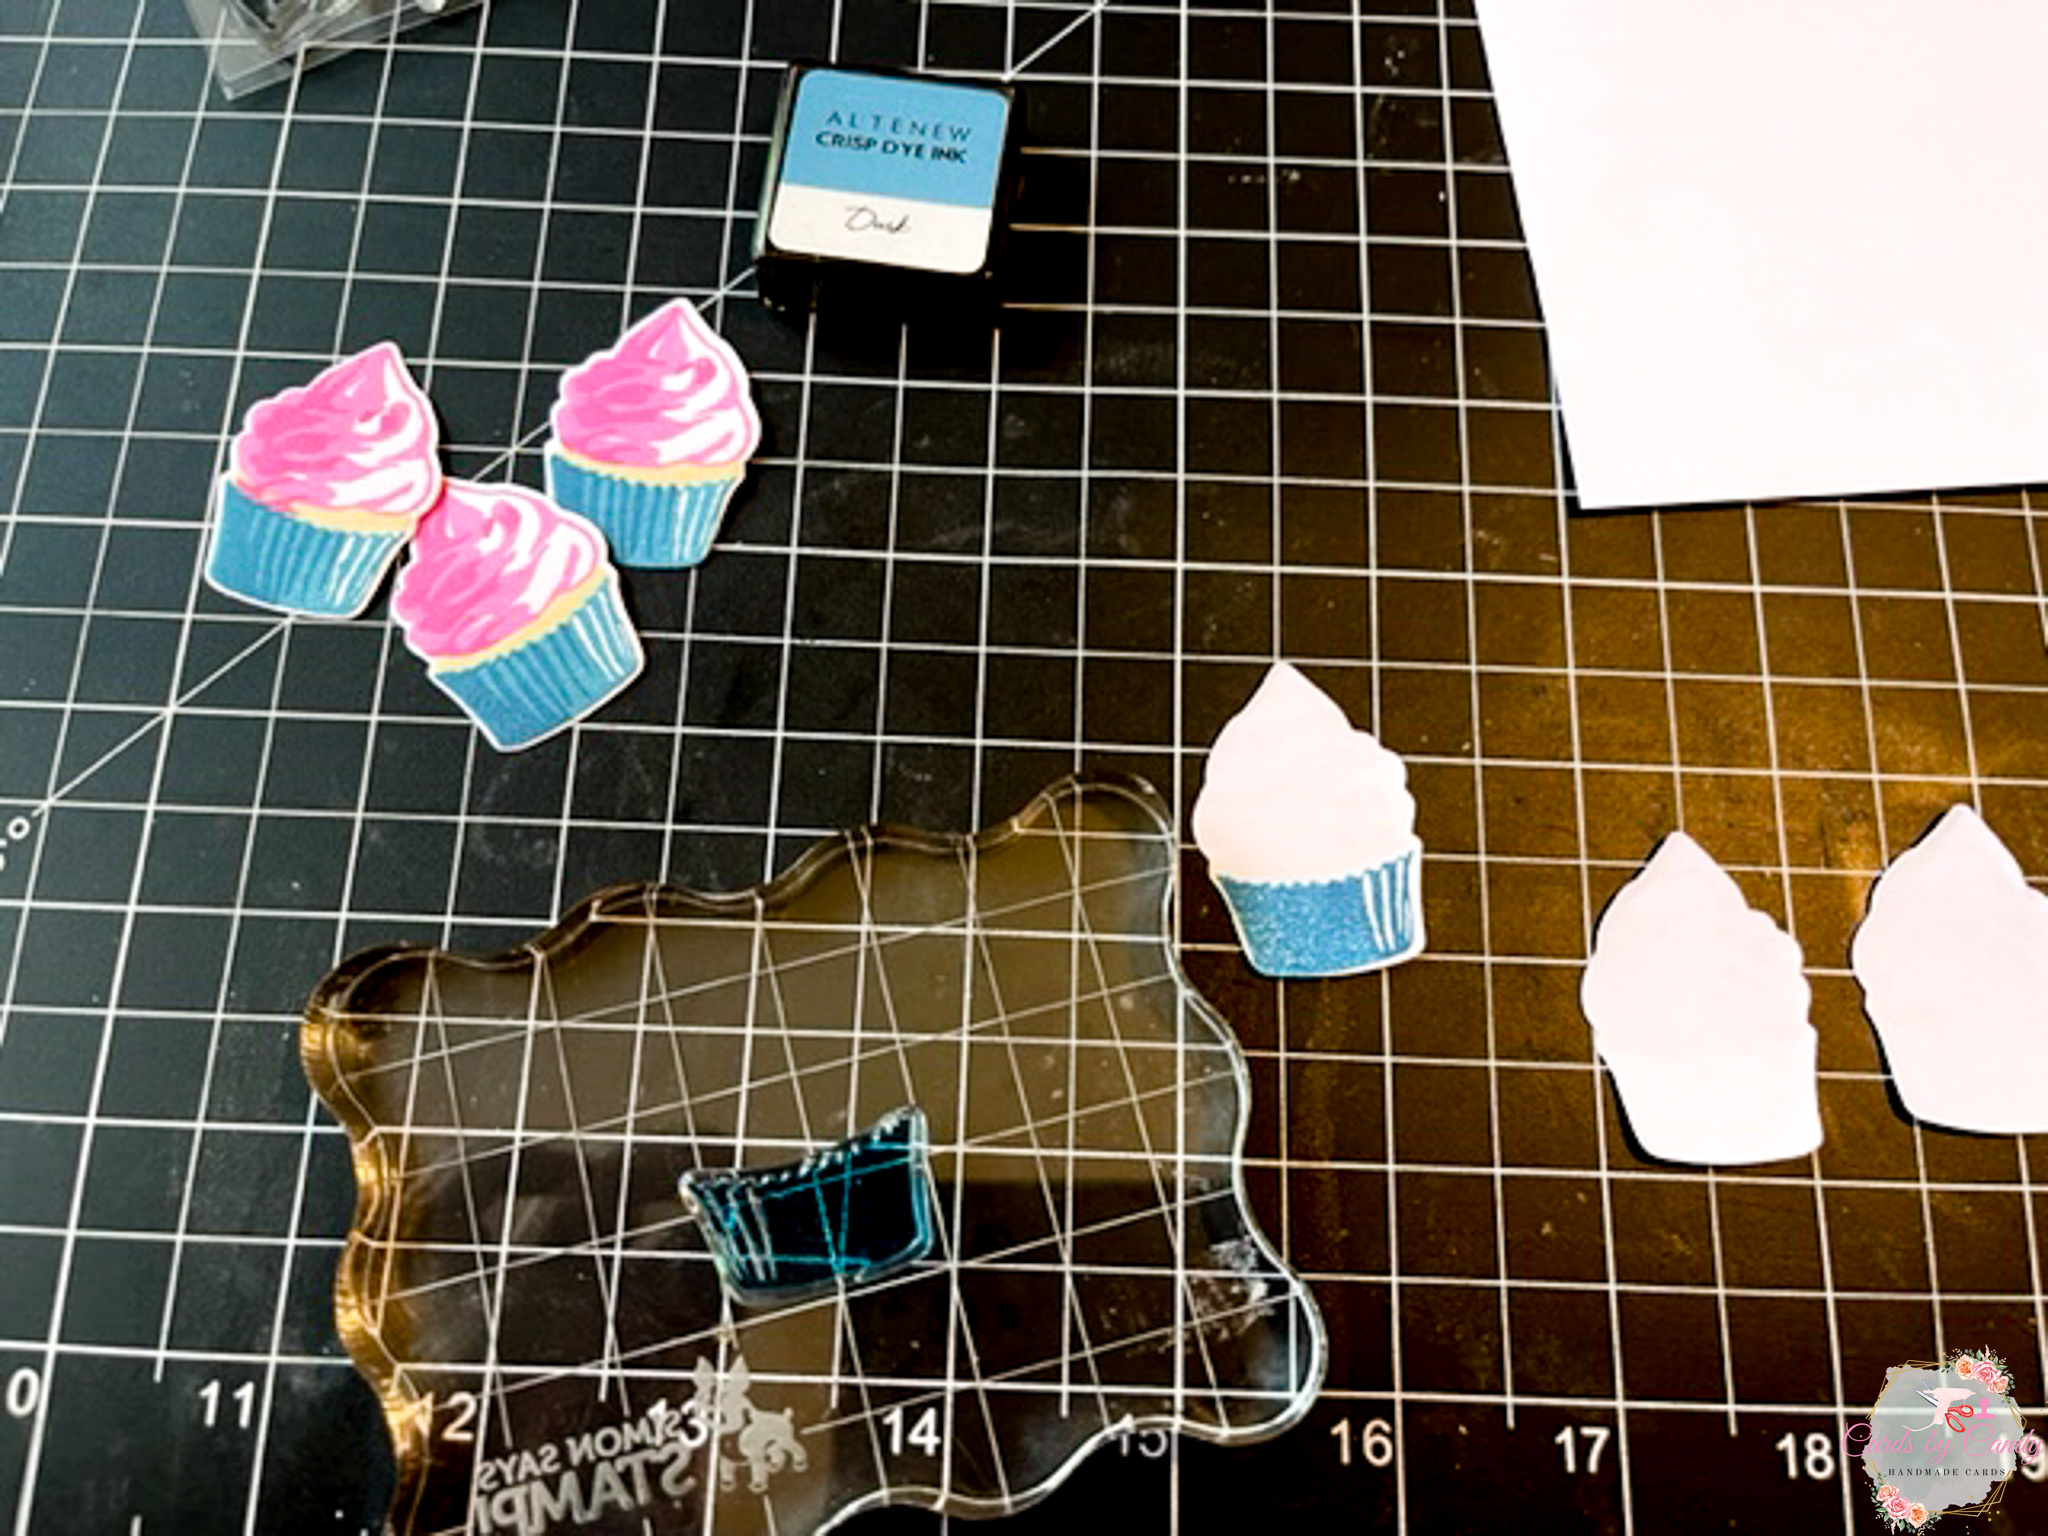
- Stamp base of cupcake in Altenew Dusk ink using the Altenew Mini Delight: Cupcake solid cup stamp layer. (I stamped 6 of these to have extra.)
- Stamp second layer of cup to show ridges using Altenew Dark Night ink and the Altenew Mini Delight: Cupcake shadows cup layer.
- Stamp cupcake layer on top of cup using Altenew Vanilla Cream ink.
- Stamp solid layer icing on top of cake layer using Altenew Pink Diamonds ink. (Only stamp this on 3 of the cupcakes.)
- Stamp shadows icing layer on top of solid icing layer using Altenew Pinkalicious ink.
You’ll notice for the cupcake paper and the actual cake layer we stamped it 6 times, but for the icing, we only stamped it on 3 of the cupcakes. The reason for this is that when creating the spinner, the icing needs to have the mirrored image in order to line up correctly for the spinner feature. It really didn’t matter with the cupcake base because it was basically the same on each side. However, the icing was different on each side. To get the mirrored image for the icing, follow these steps:
- Die cut these cupcakes out using the coordinating Altenew Mini Delight: Cupcake die. (You’ll do this and then add the icing layers to these later since it will be the mirrored image.)
- Stamp solid layer icing using Altenew Pink Diamonds ink onto rubber stamp mat.
- Gently place die cut on top of inked solid icing image. Once finished, wipe off ink.
- Stamp icing shadows layer using altenew Pinkalicious ink onto rubber mat.
- Gently place die cut on top of inked shadows icing image.
- If the inking is slightly lighter or off…that’s ok as it can be fixed by using a watercolor brush and the Altenew Pinkalicious ink. Use the watercolor brush to go over lighter areas to match the original cupcakes. This is why I created several extra cupcakes in case I messed up on some.


- Now, you will take your two best cupcakes (1 regular stamped and 1 mirrored stamped cupcake) to set to the side.
- Glue a stamped cupcake to the back of your best regular stamped cupcake.
- Glue another stamped cupcake to the back of your best mirrored stamped cupcake.
- Using double sided adhesive, adhere a piece of string or twine to the middle of the back side of the mirrored cupcake. Make sure the string is long enough to go the full middle of the die cut window.
- Adhere the ends of the string to the top and bottom of the die cut window.
- Add more adhesive to the regular cupcake and adhere this to the top of the mirrored cupcake to sandwich the string between the two cupcakes.
- Die cut a pink panel with the circle die and use this panel to hide the string taped to the top and bottom of the die cut window.


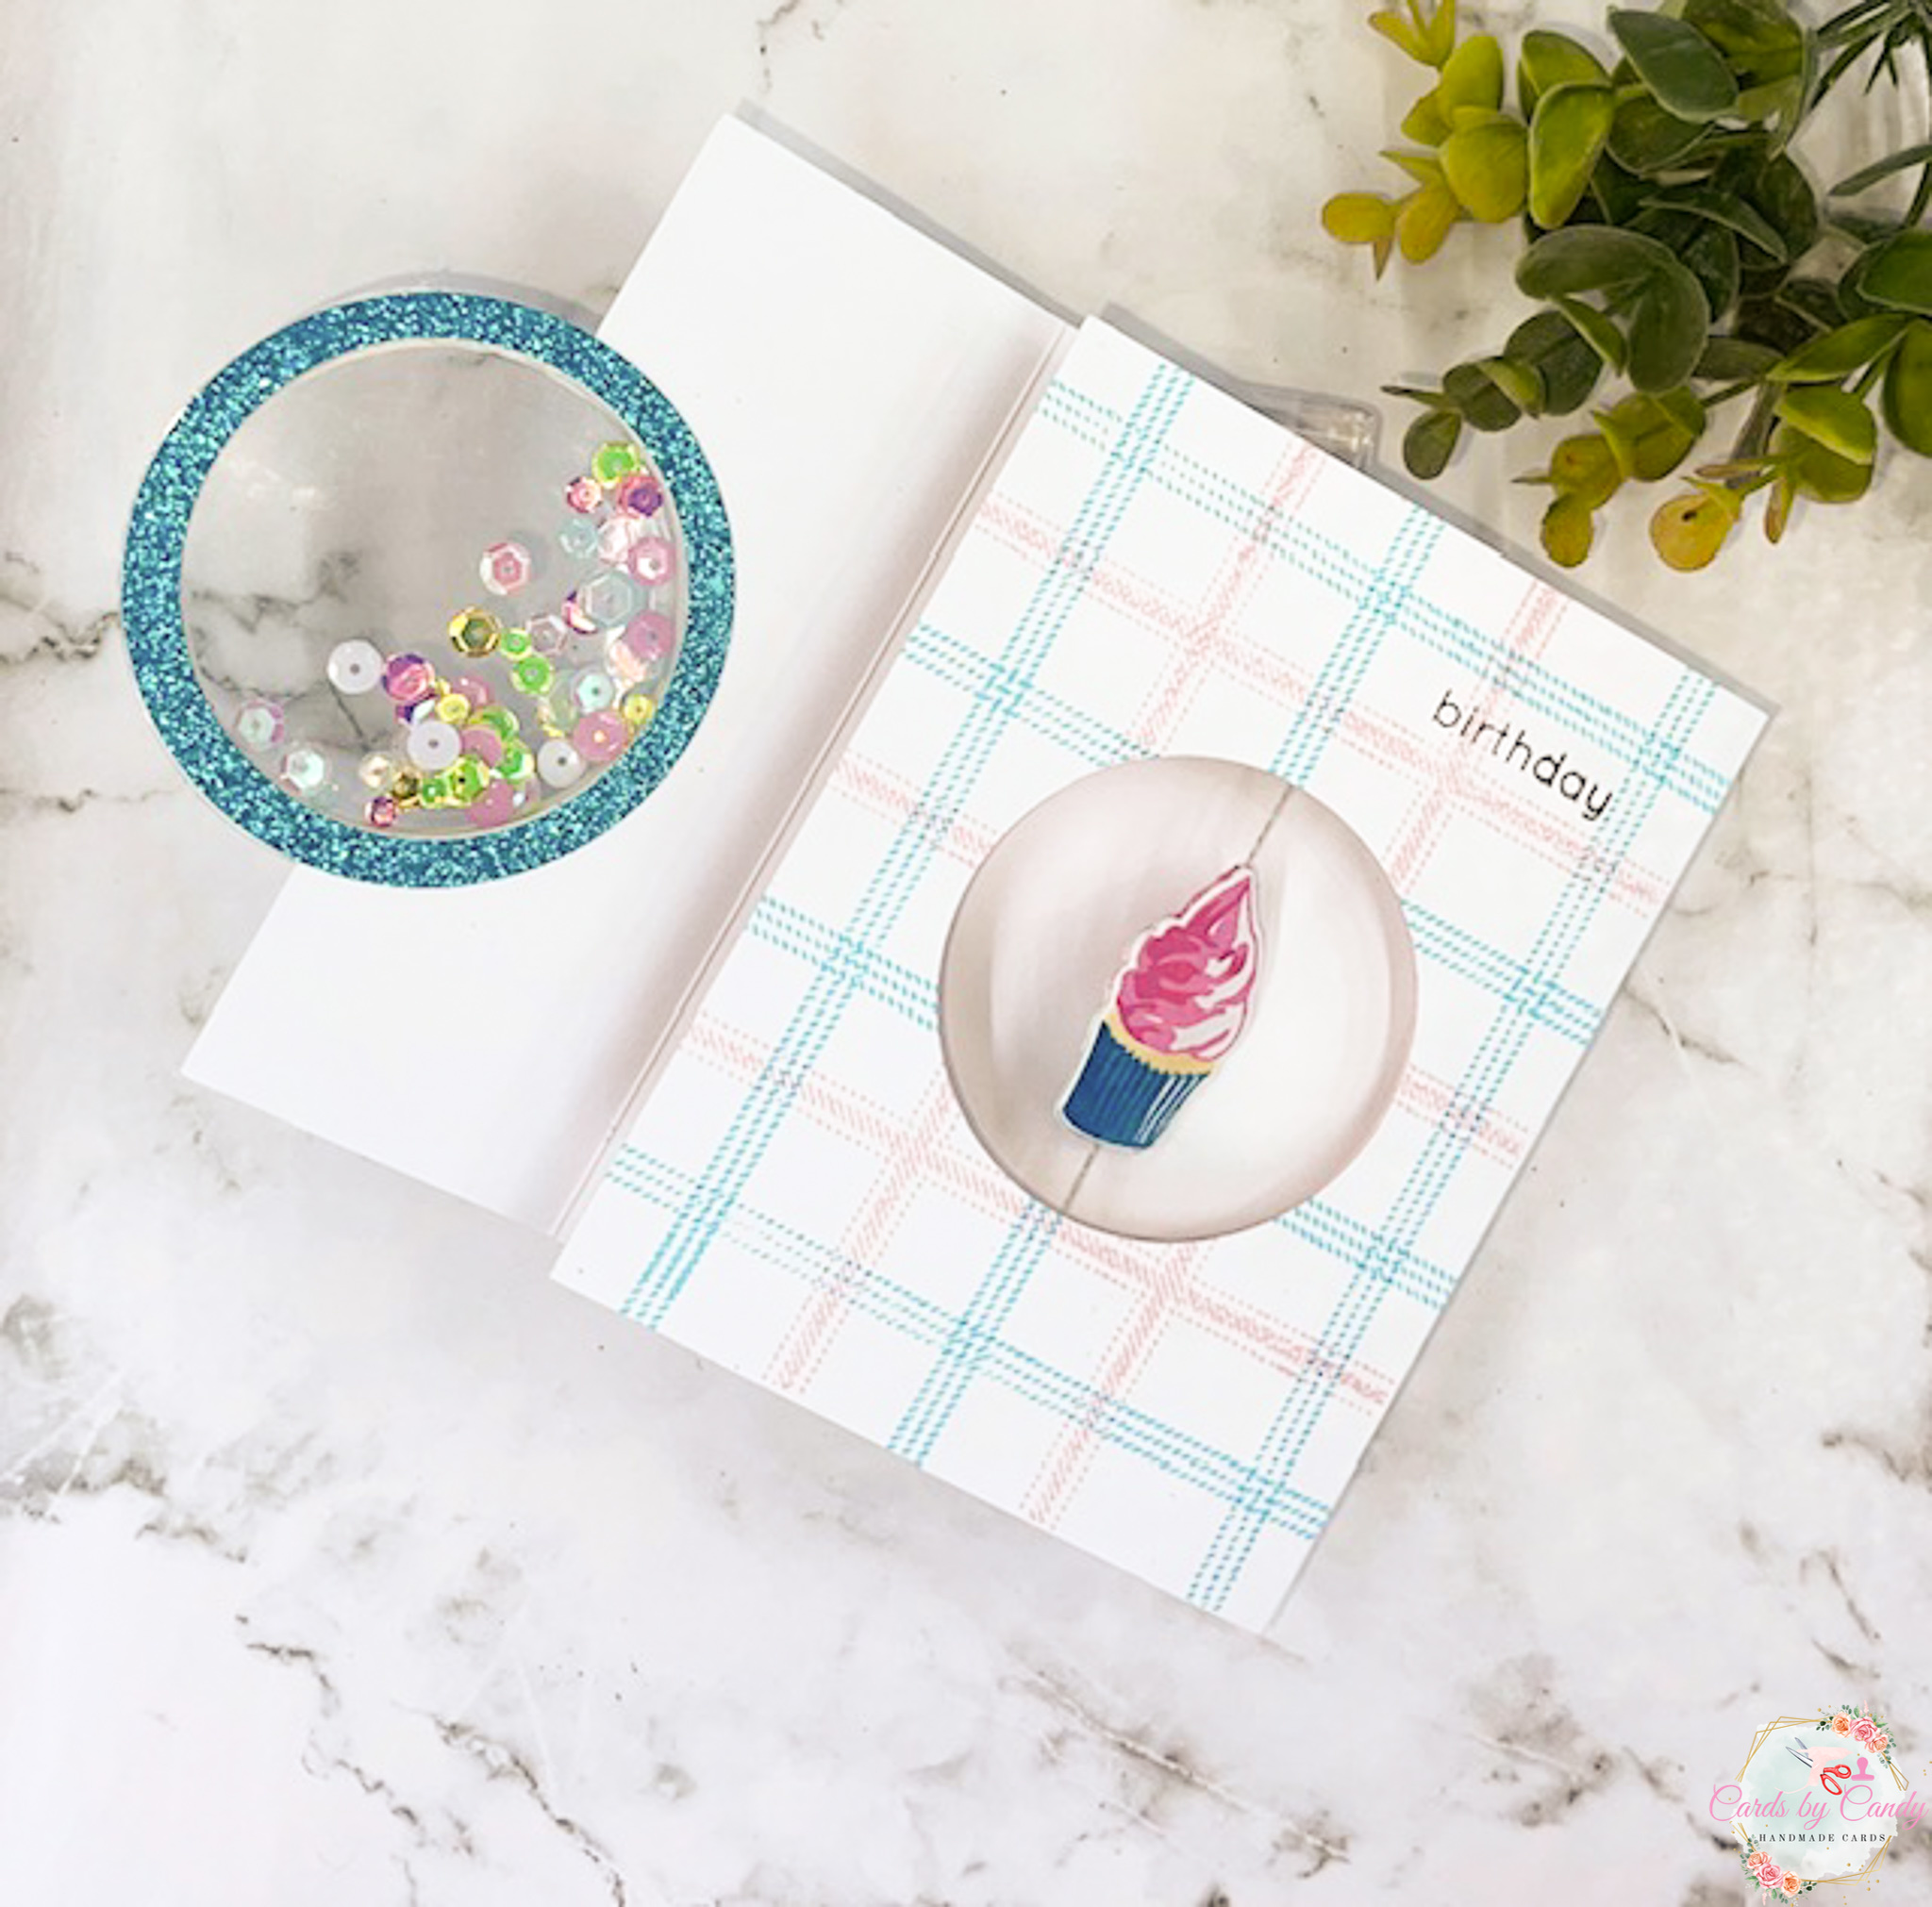
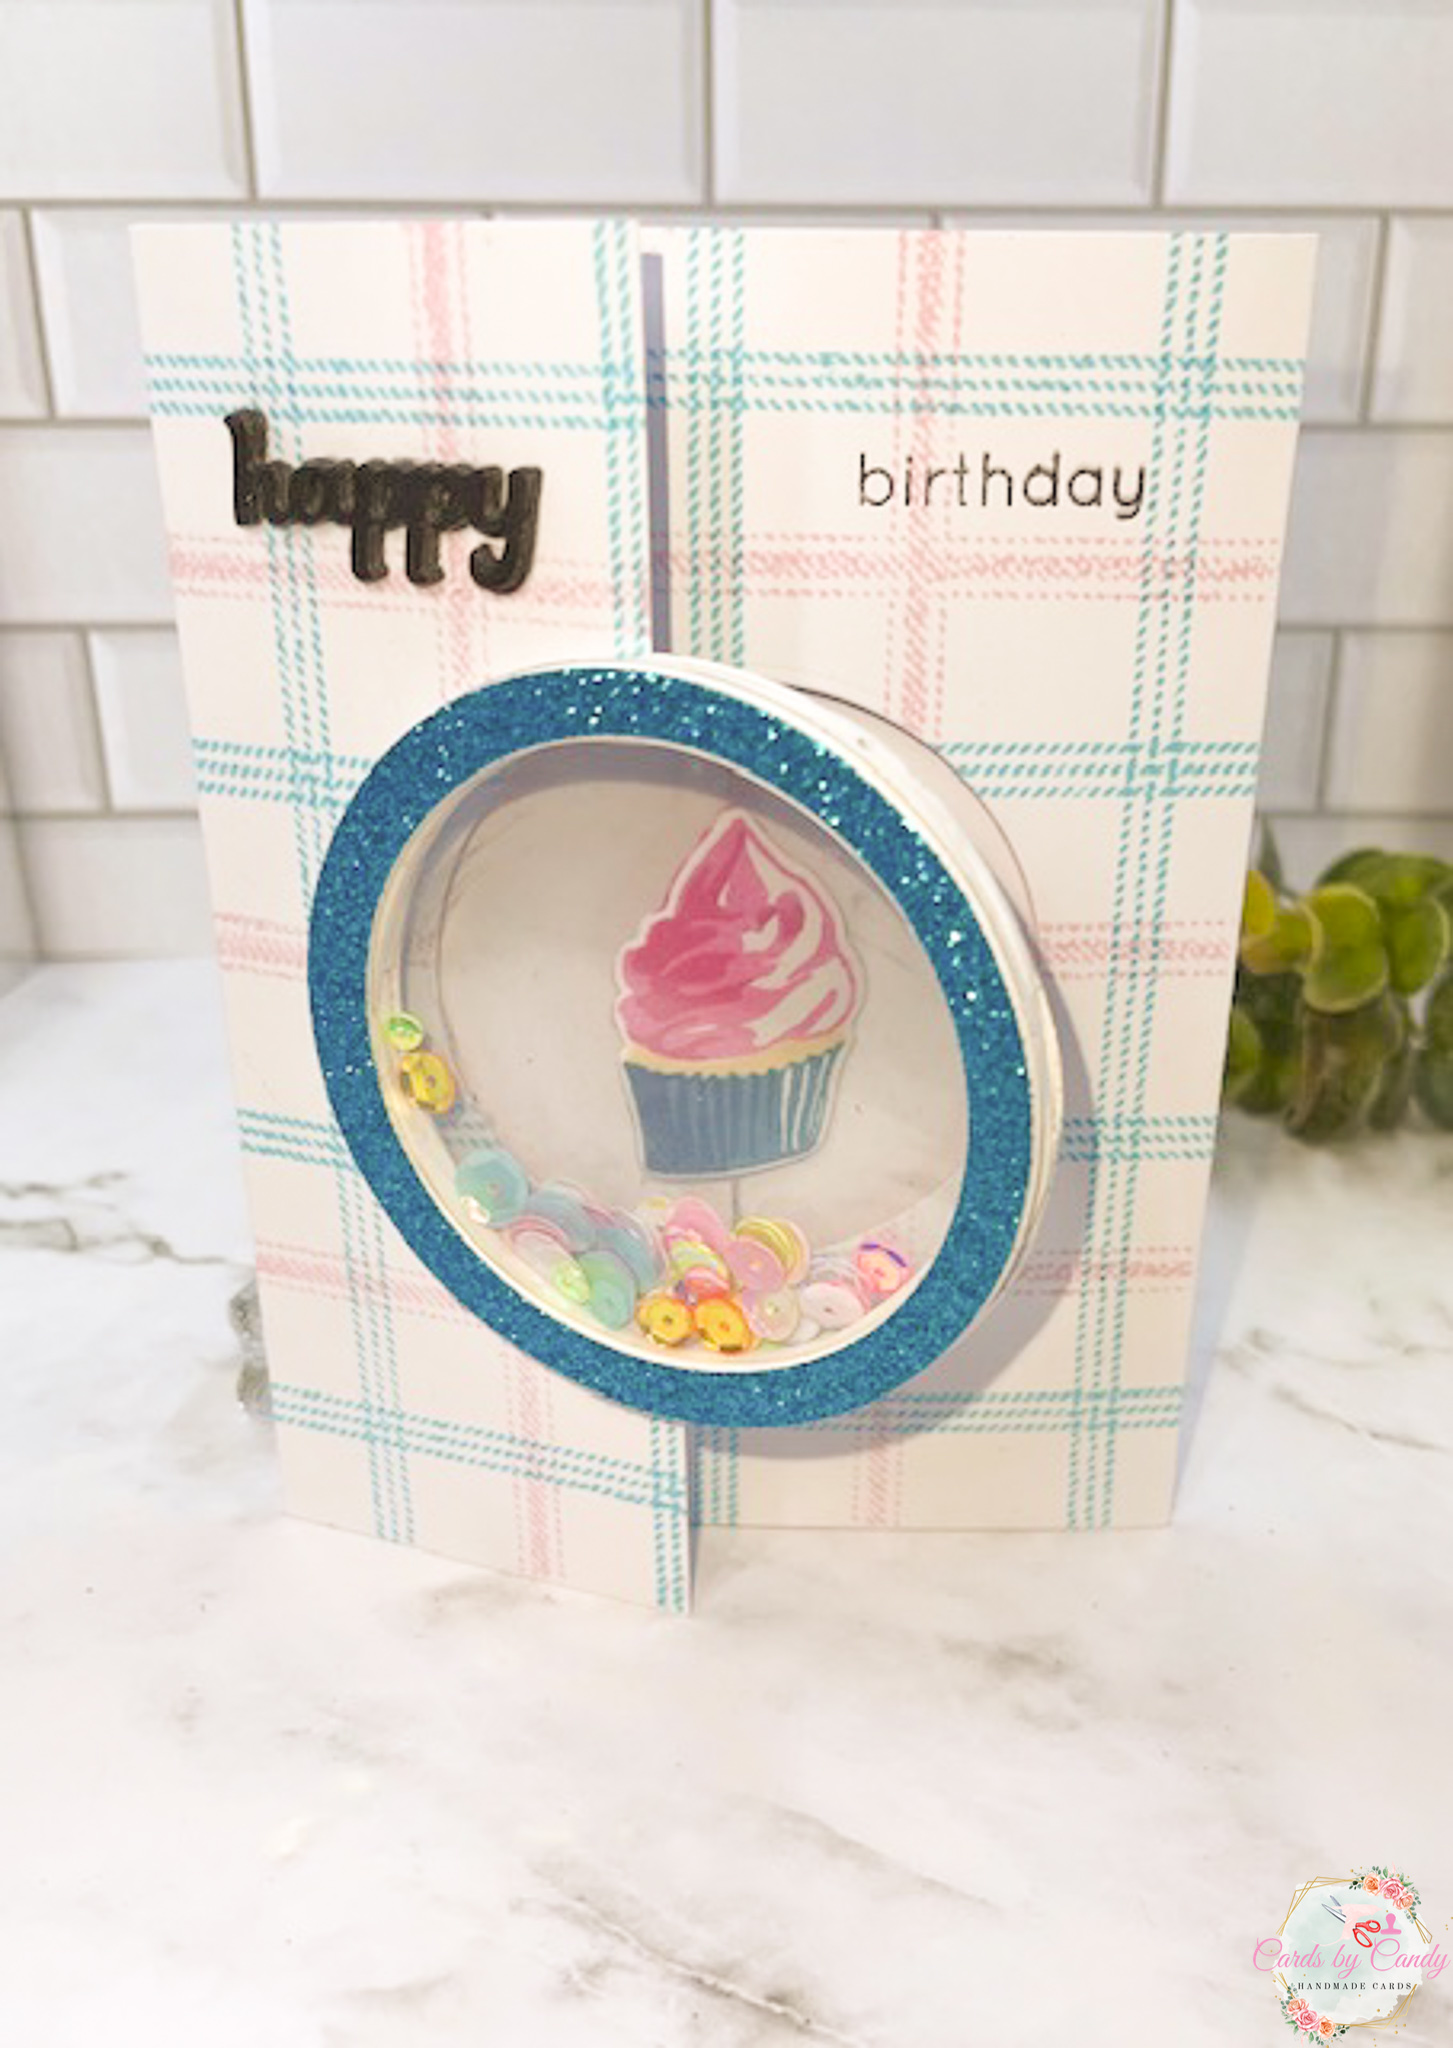
Finally, using the Altenew Mini Delight: Cupcake Die, I die cut out the “happy” sentiment five times using heavy black cardstock. Before die cutting the sentiment, I added a double-sided adhesive sheet to make it easier to adhere the layers. Once die cut, I stacked the layers and placed this on the top left of the card. Then, I stamped the “Birthday” sentiment from the Altenew Layered Cupcake stamp set. To complete the card, I added some black string with silver enlaced and tied a bow to keep the card closed.


This was really a fun card to make. I enjoyed it so much! I know whoever receives this card will enjoy the double interactive feature. Let me know in the comments what you like about this card and how you can create a double feature interactive card using the dies and stamps you already have on hand.


Eeek! How adorable are those colours?! And your spinner looks perfect! Thank you so much for submitting your wonderful work to the AECP assignment gallery.
Thank you, Erum!