
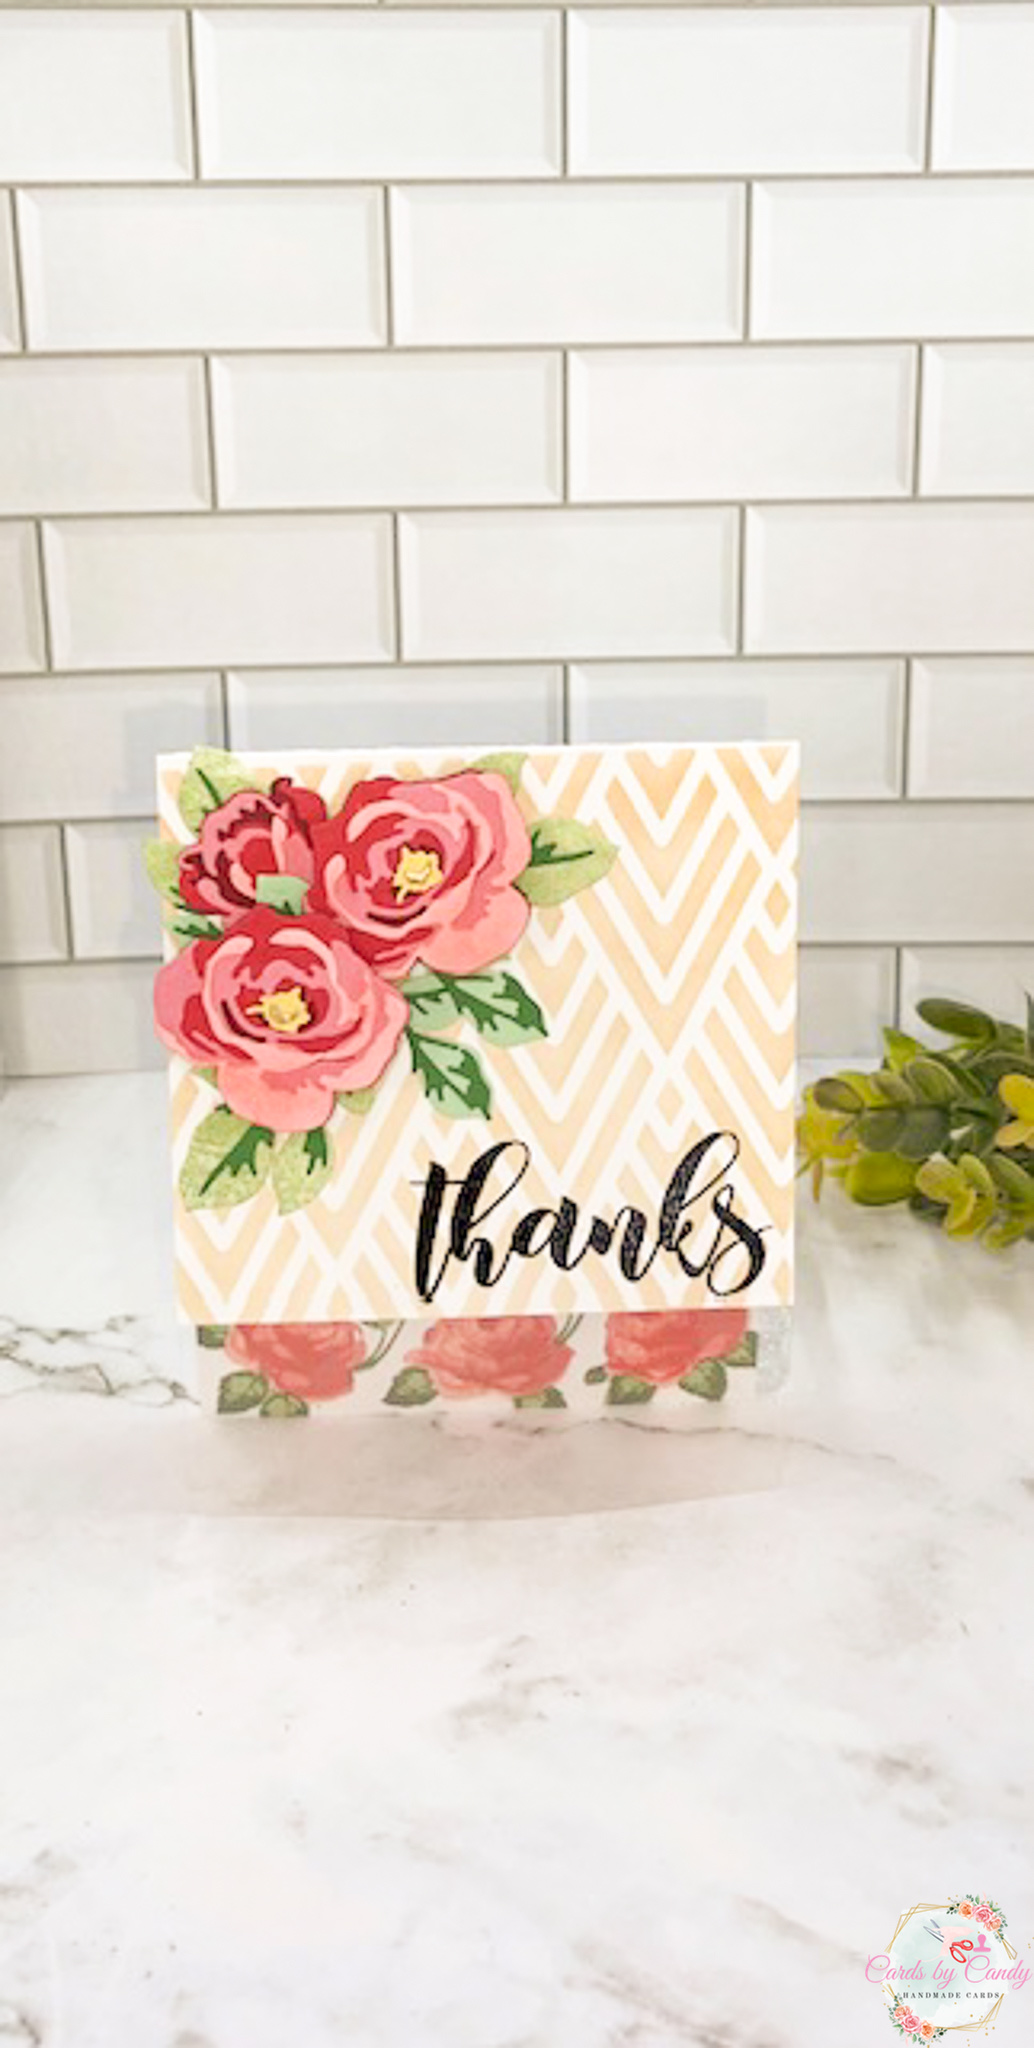

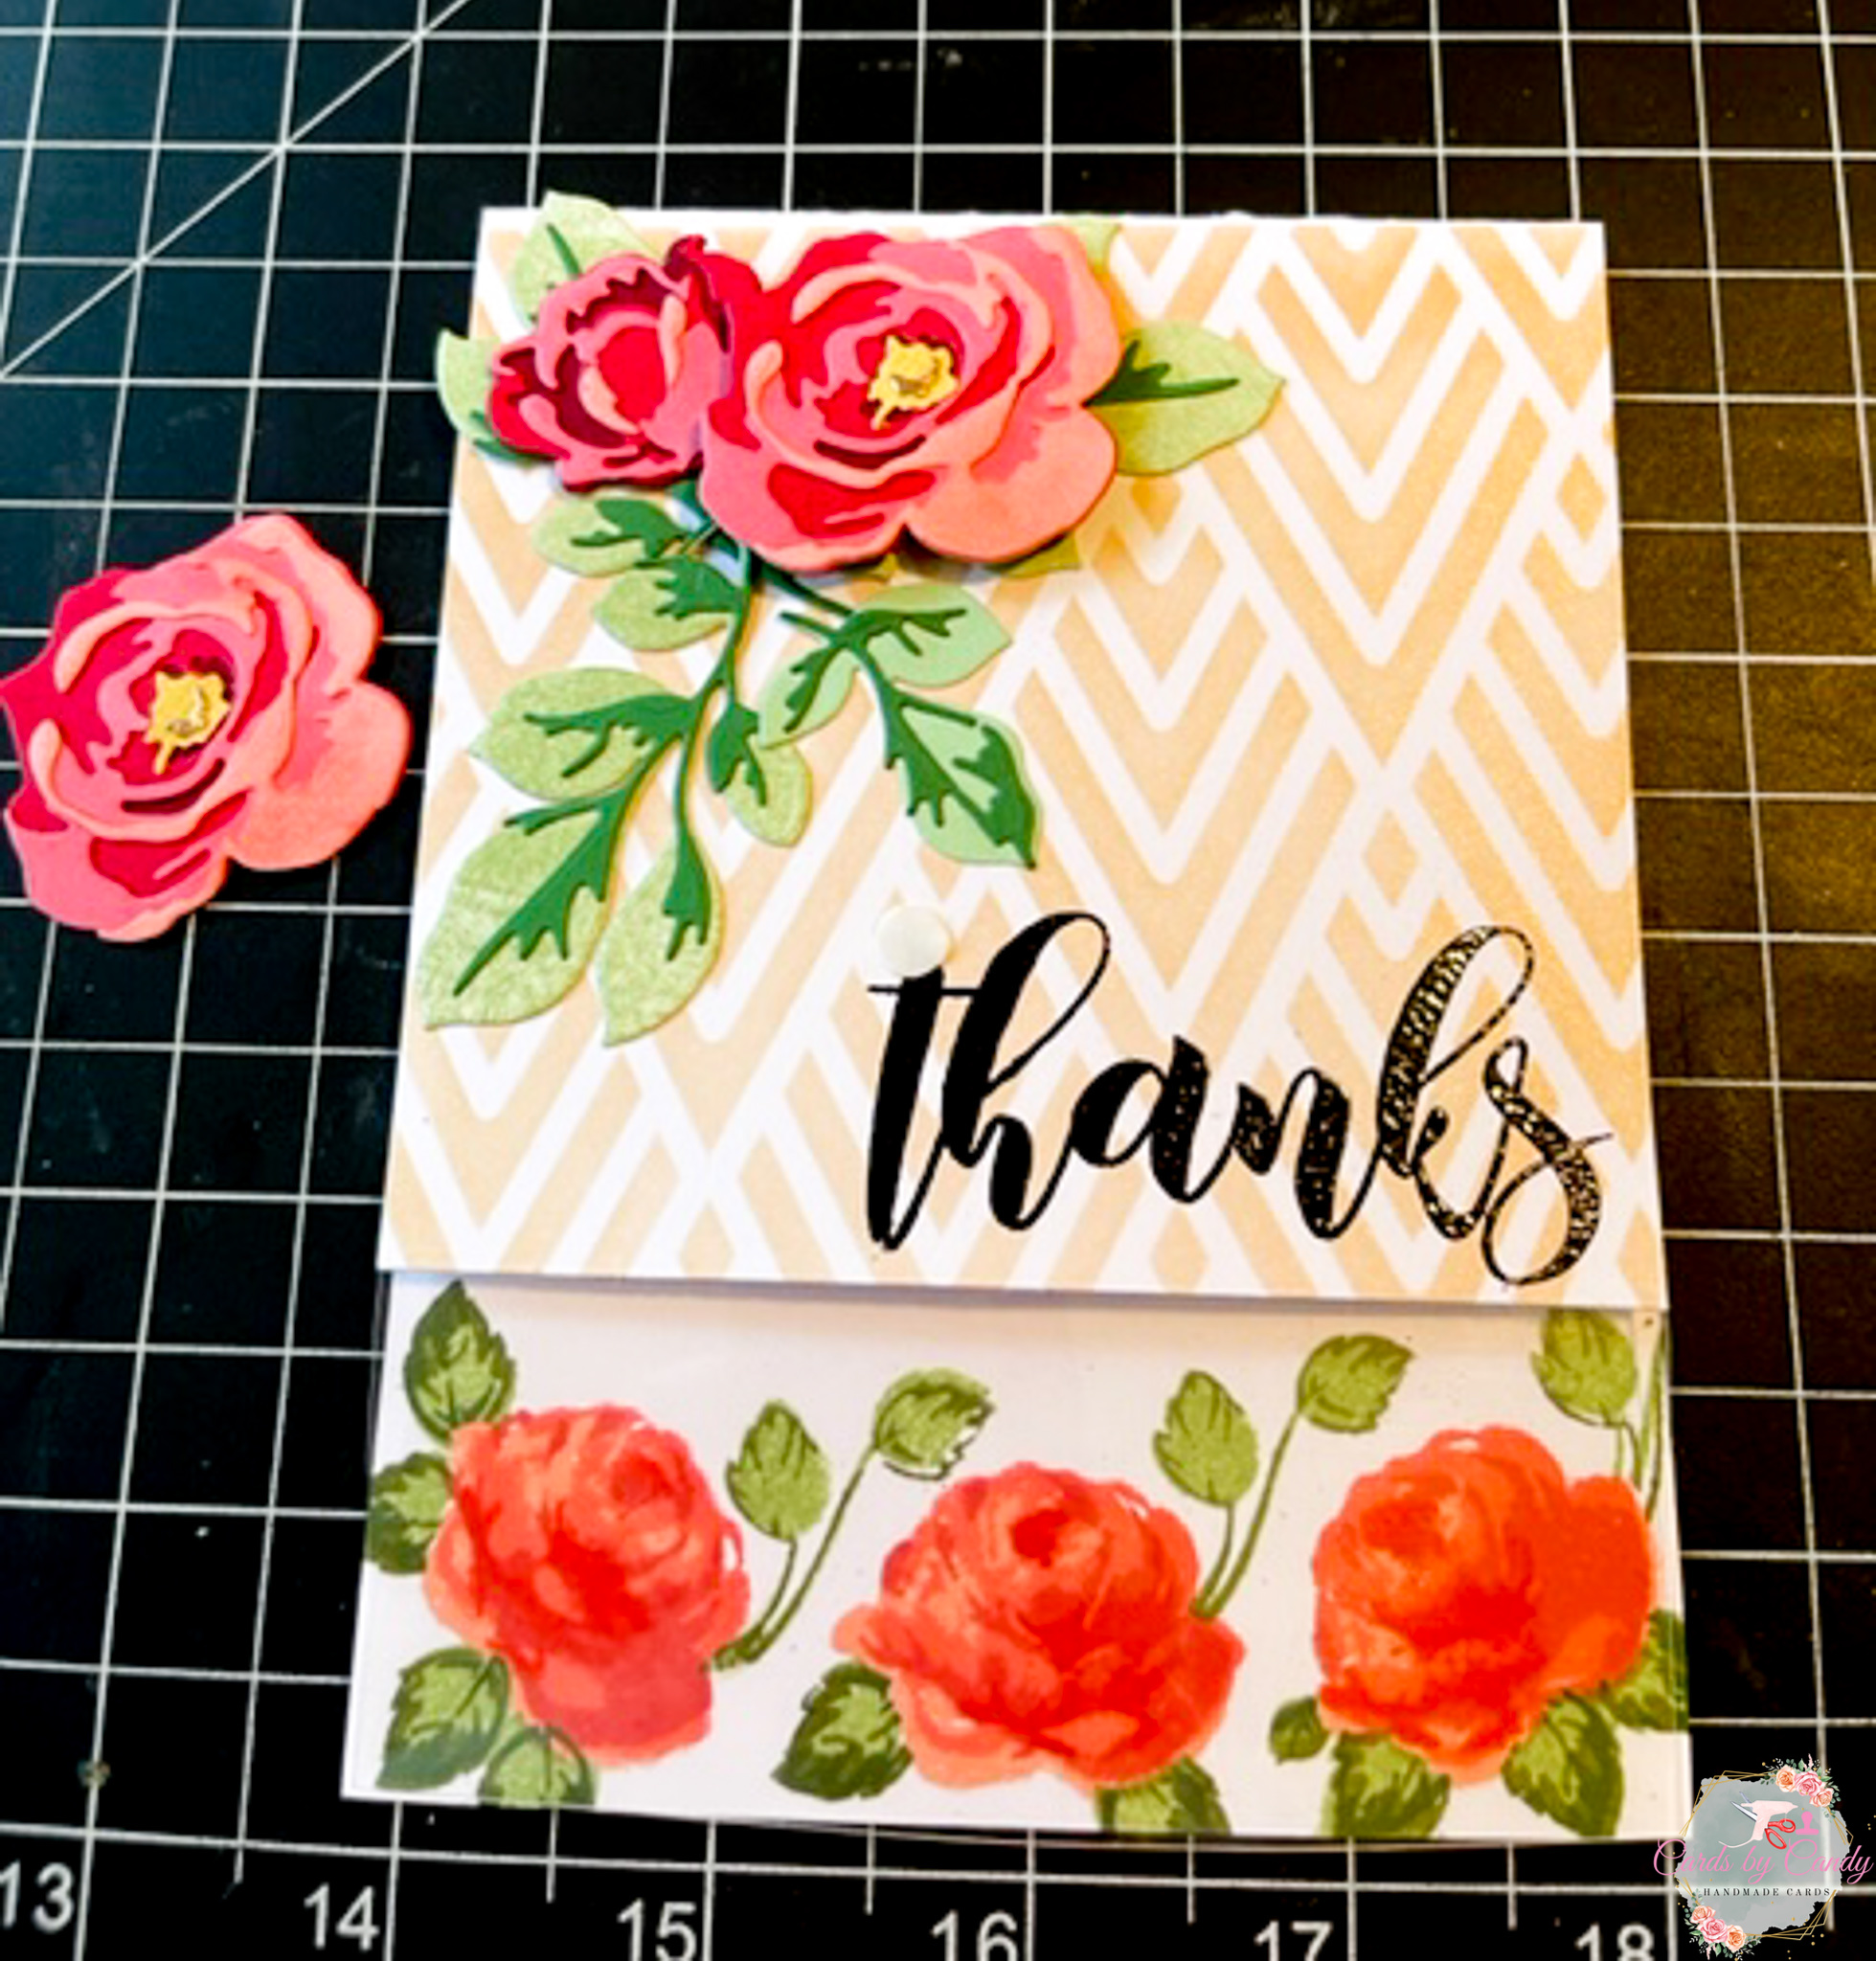
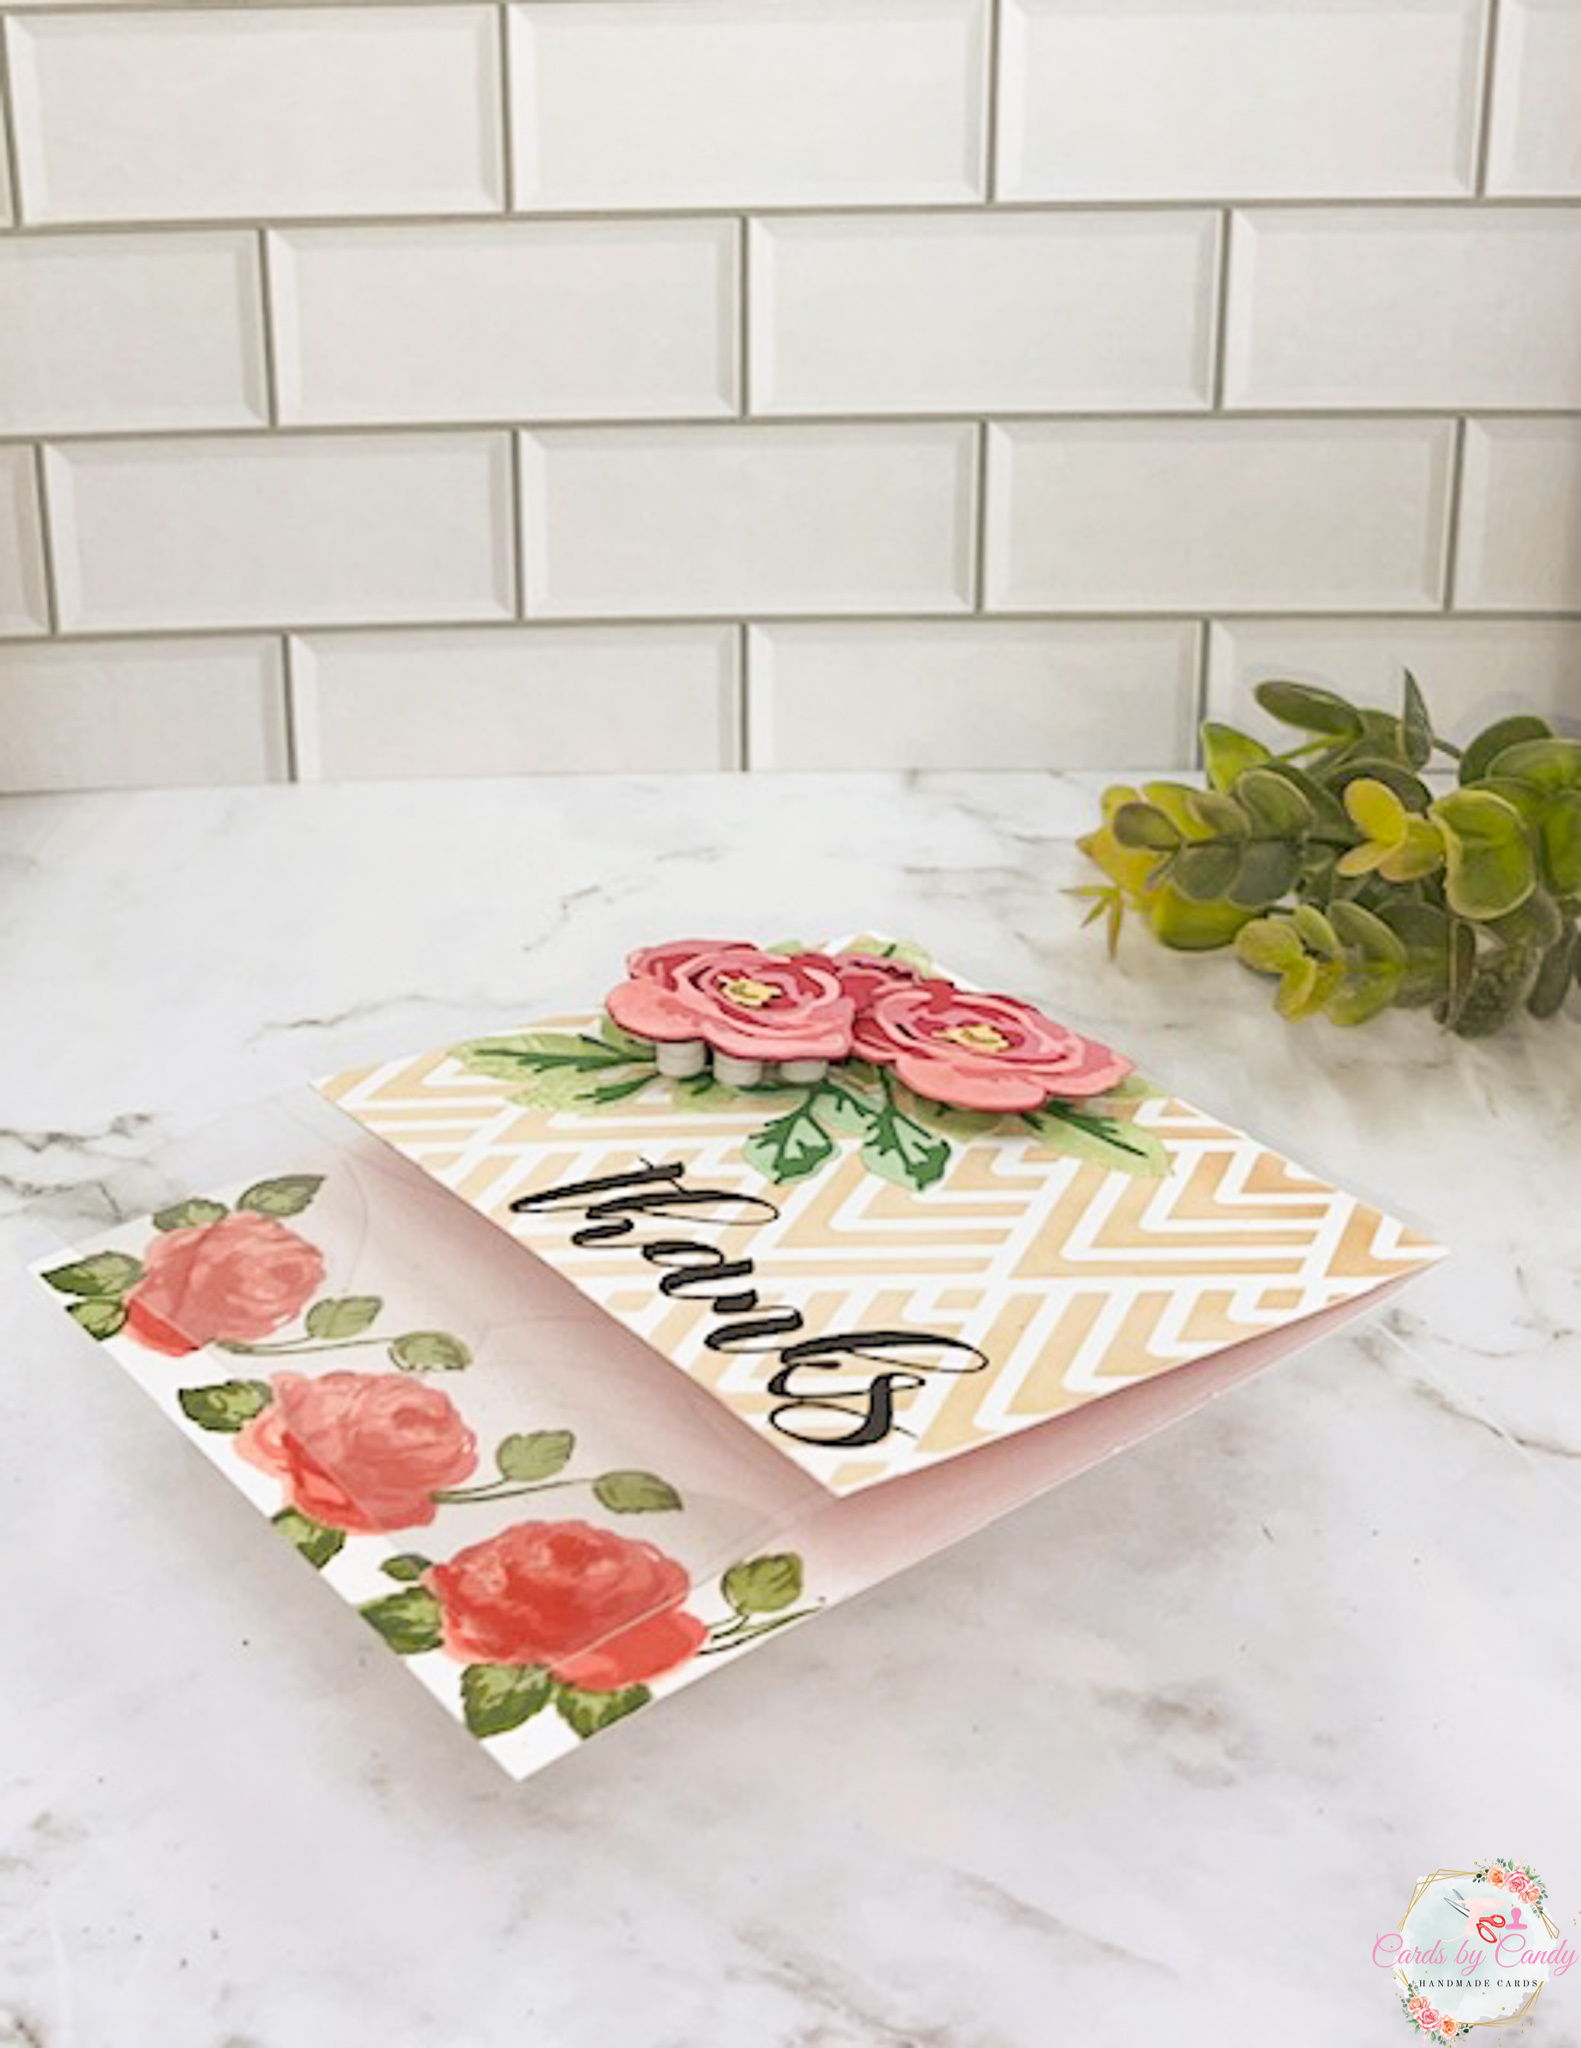
Welcome back to another fun day of crafting! I am EXCITED to share with you this pretty card featuring techniques I learned from the Altenew Layering Dies Class. There are a few fun elements of interest in this card, so let’s get started with how I made it.

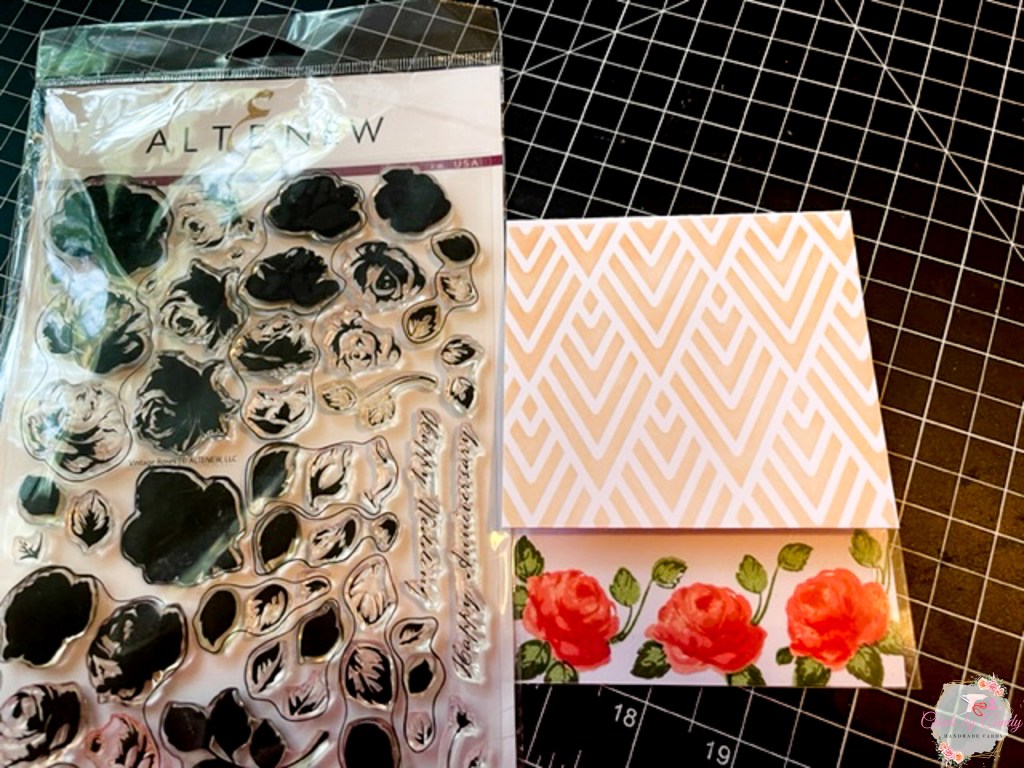
First, I knew I wanted to have gold in my card and I was thinking of the perfect stencil to create my own background for it. This card also features heat embossing, acetate peek-through panel, layering rose stamps, and the focal point is the layering flower dies.
- Start with top-folding A2 card (4.25″ by 5.5″ – scored at 5.5″).
- Cut off 1.5 inches of one end of card base.
- Use a piece of purple tape to cover the scored line and a little portion of the back of the card. This will keep ink from getting on the back.
- Tape down Altenew Deco Wallpaper Stencil onto front of card.
- Use a blending brush and Delicata Gold Pigment ink to blend color onto card base. Make sure to begin blending first on a scrap piece of paper before putting the brush onto the card. This will help to keep the blending even and avoid harsh lines. I added a slightly darker layer of the gold ink at the top of the card.
- Remove stencil and purple tape.
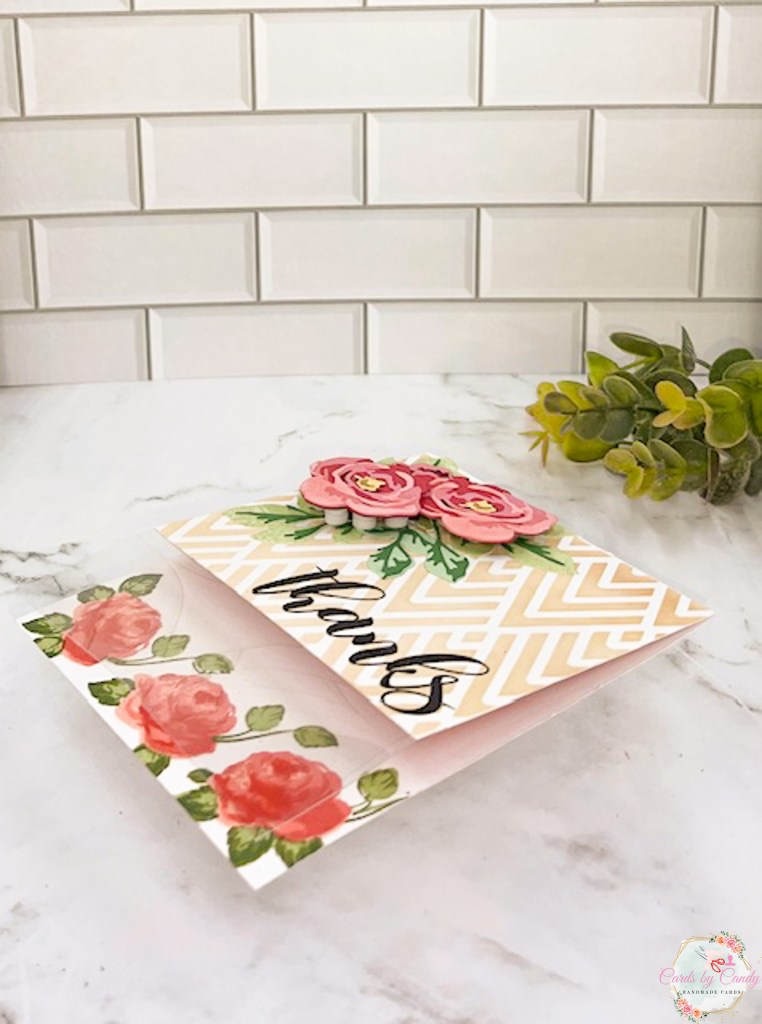
- Glue down 2 inch by 5.5inch acetate piece to the bottom of the cut panel. Make sure it is glued from the inside of the card.
- Cover up the inside part and the glued acetate portion with cardstock or decorative paper. Make sure not to cover up the acetate, only the part where it was glued.
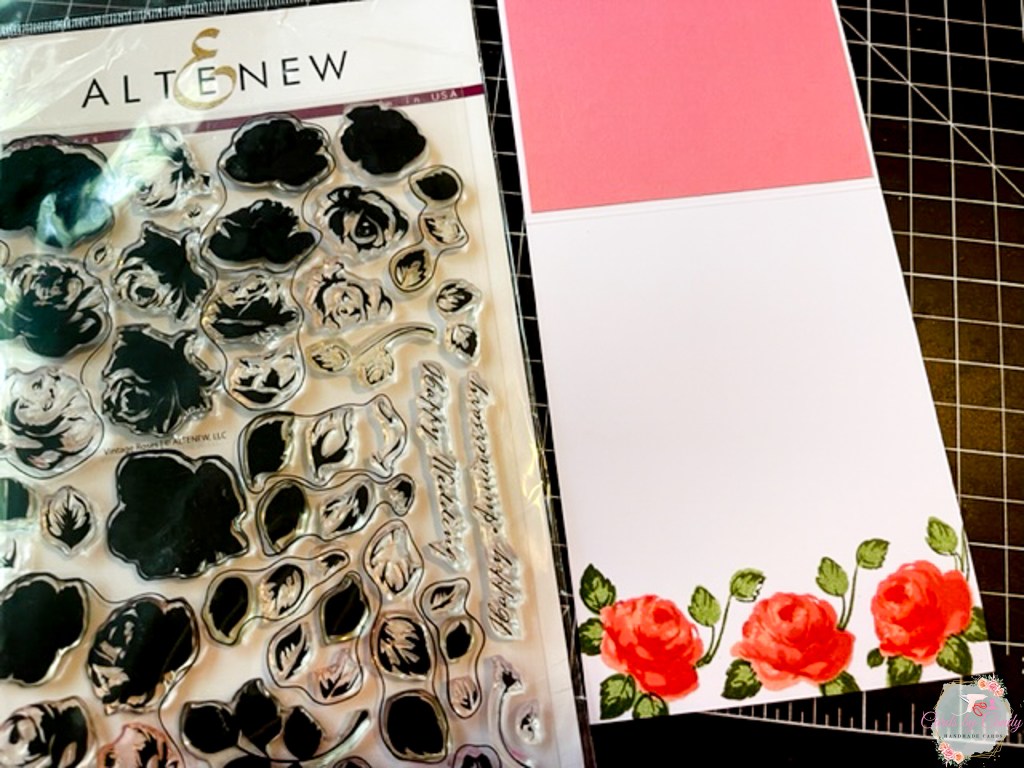
- At the bottom of the inside of the card, begin stamping layered roses using Altenew Vintage Roses Layering Stamp set.
- Stamp solid layer 3x in Altenew Pink Pearl ink.
- Stamp next layer on top of solid layers in Altenew Coral Bliss ink.
- Stamp third layer on top of 2nd layers in Altenew Heart Beat ink.
- Stamp fourth layer on top of 3rd layers in Altenew Vintage Berry ink.
- Using masking paper, cover up the roses in order to stamp the leaves. There are 3 layers for the leaves stamped in Altenew Frayed leaf, Forest Glades, and Green Opal.
- Repeat #14 for each flower.

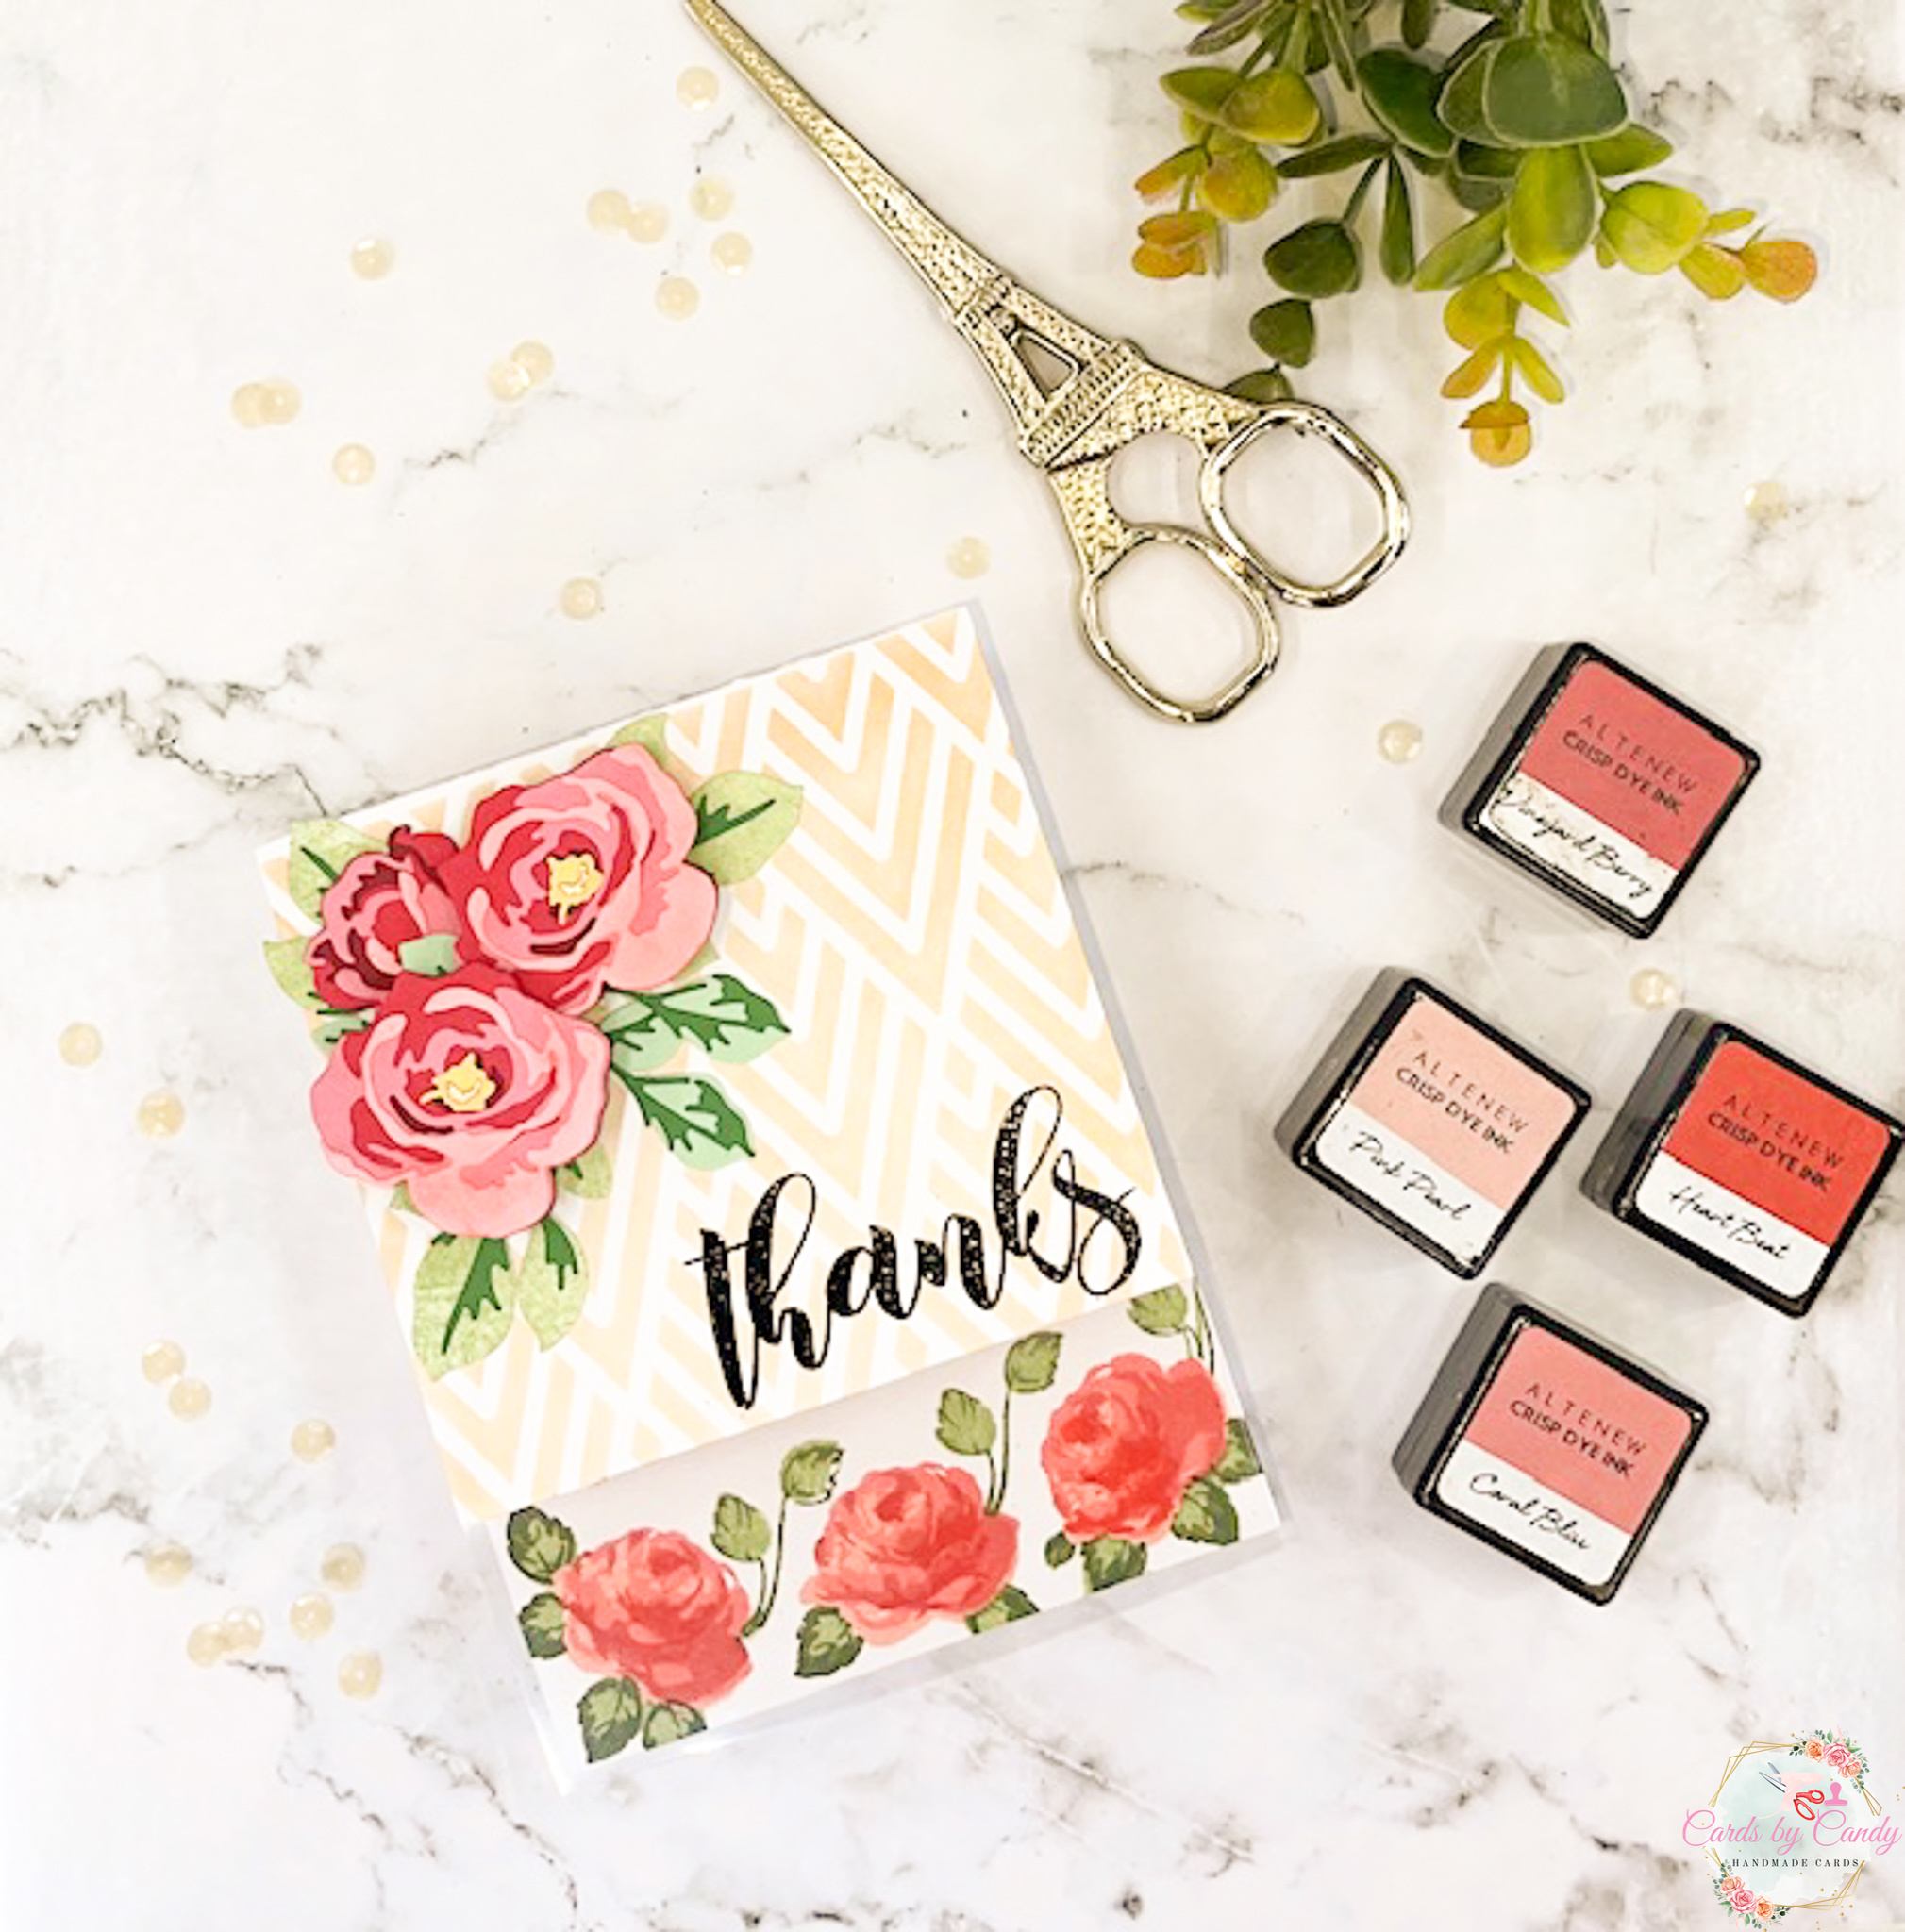
Now, let’s finish the front of the card! For the sentiment, I rubbed anti-static powder over the bottom right of the stenciled portion of the card. Then, using Versamark Ink, I stamped the “Thanks” from the Altenew Mini Thanks Stamp set. Next, I poured black embossing powder over it and heat embossed the sentiment.
I die cut the focal flowers from the Altenew Garden Picks 3D Die Set for the front of the card. I die cut these layers using similar color cardstock to match my inks for the inside of the card. When stamping roses, you use the lightest layer first; however with the die cut layering flowers, most of the time you begin with the darkest color.
- Die cut largest solid layer in wine colored cardstock.
- Die cut second layer in red cardstock.
- Die cut next layer in deep rose colored cardstock.
- Die cut top layer in light pink cardstock.
- Die cut center piece in yellow cardstock.
- Die cut middle of center in gold foil cardstock.
What I love about these layering flower die sets from Altenew is that the package has wonderful step by step instructions for putting these together. For the most part you will focus on certain edges of the die shapes and align those, but for the top smaller layers, you can use the guide to help. I die cut the leaves using white cardstock and a darker green cardstock. I was out of a matching light green cardstock, so I improvised by using a brayer and Altenew Frayed Leaf ink over the white solid cardstock and then die cut it.
Because this card is meant to have layers, I first glued down the leaves, then I popped up the smallest flower using foam tape. I slightly covered the bud with the next flower to the right and popped it up with foam tape too, making sure not to put the foam on the side where this flower would touch the rose bud. For the final left flower, I doubled up my foam tape to ensure this one would stand up over the other two flowers. To break up all the red clumped together, I added a couple of leaves in between the flowers. Also, once it was finished, I notice the pinks were pinker than I wanted and to match the inside roses, I needed to add a little bit of Altenew Coral Bliss ink to these petals to make it match better.


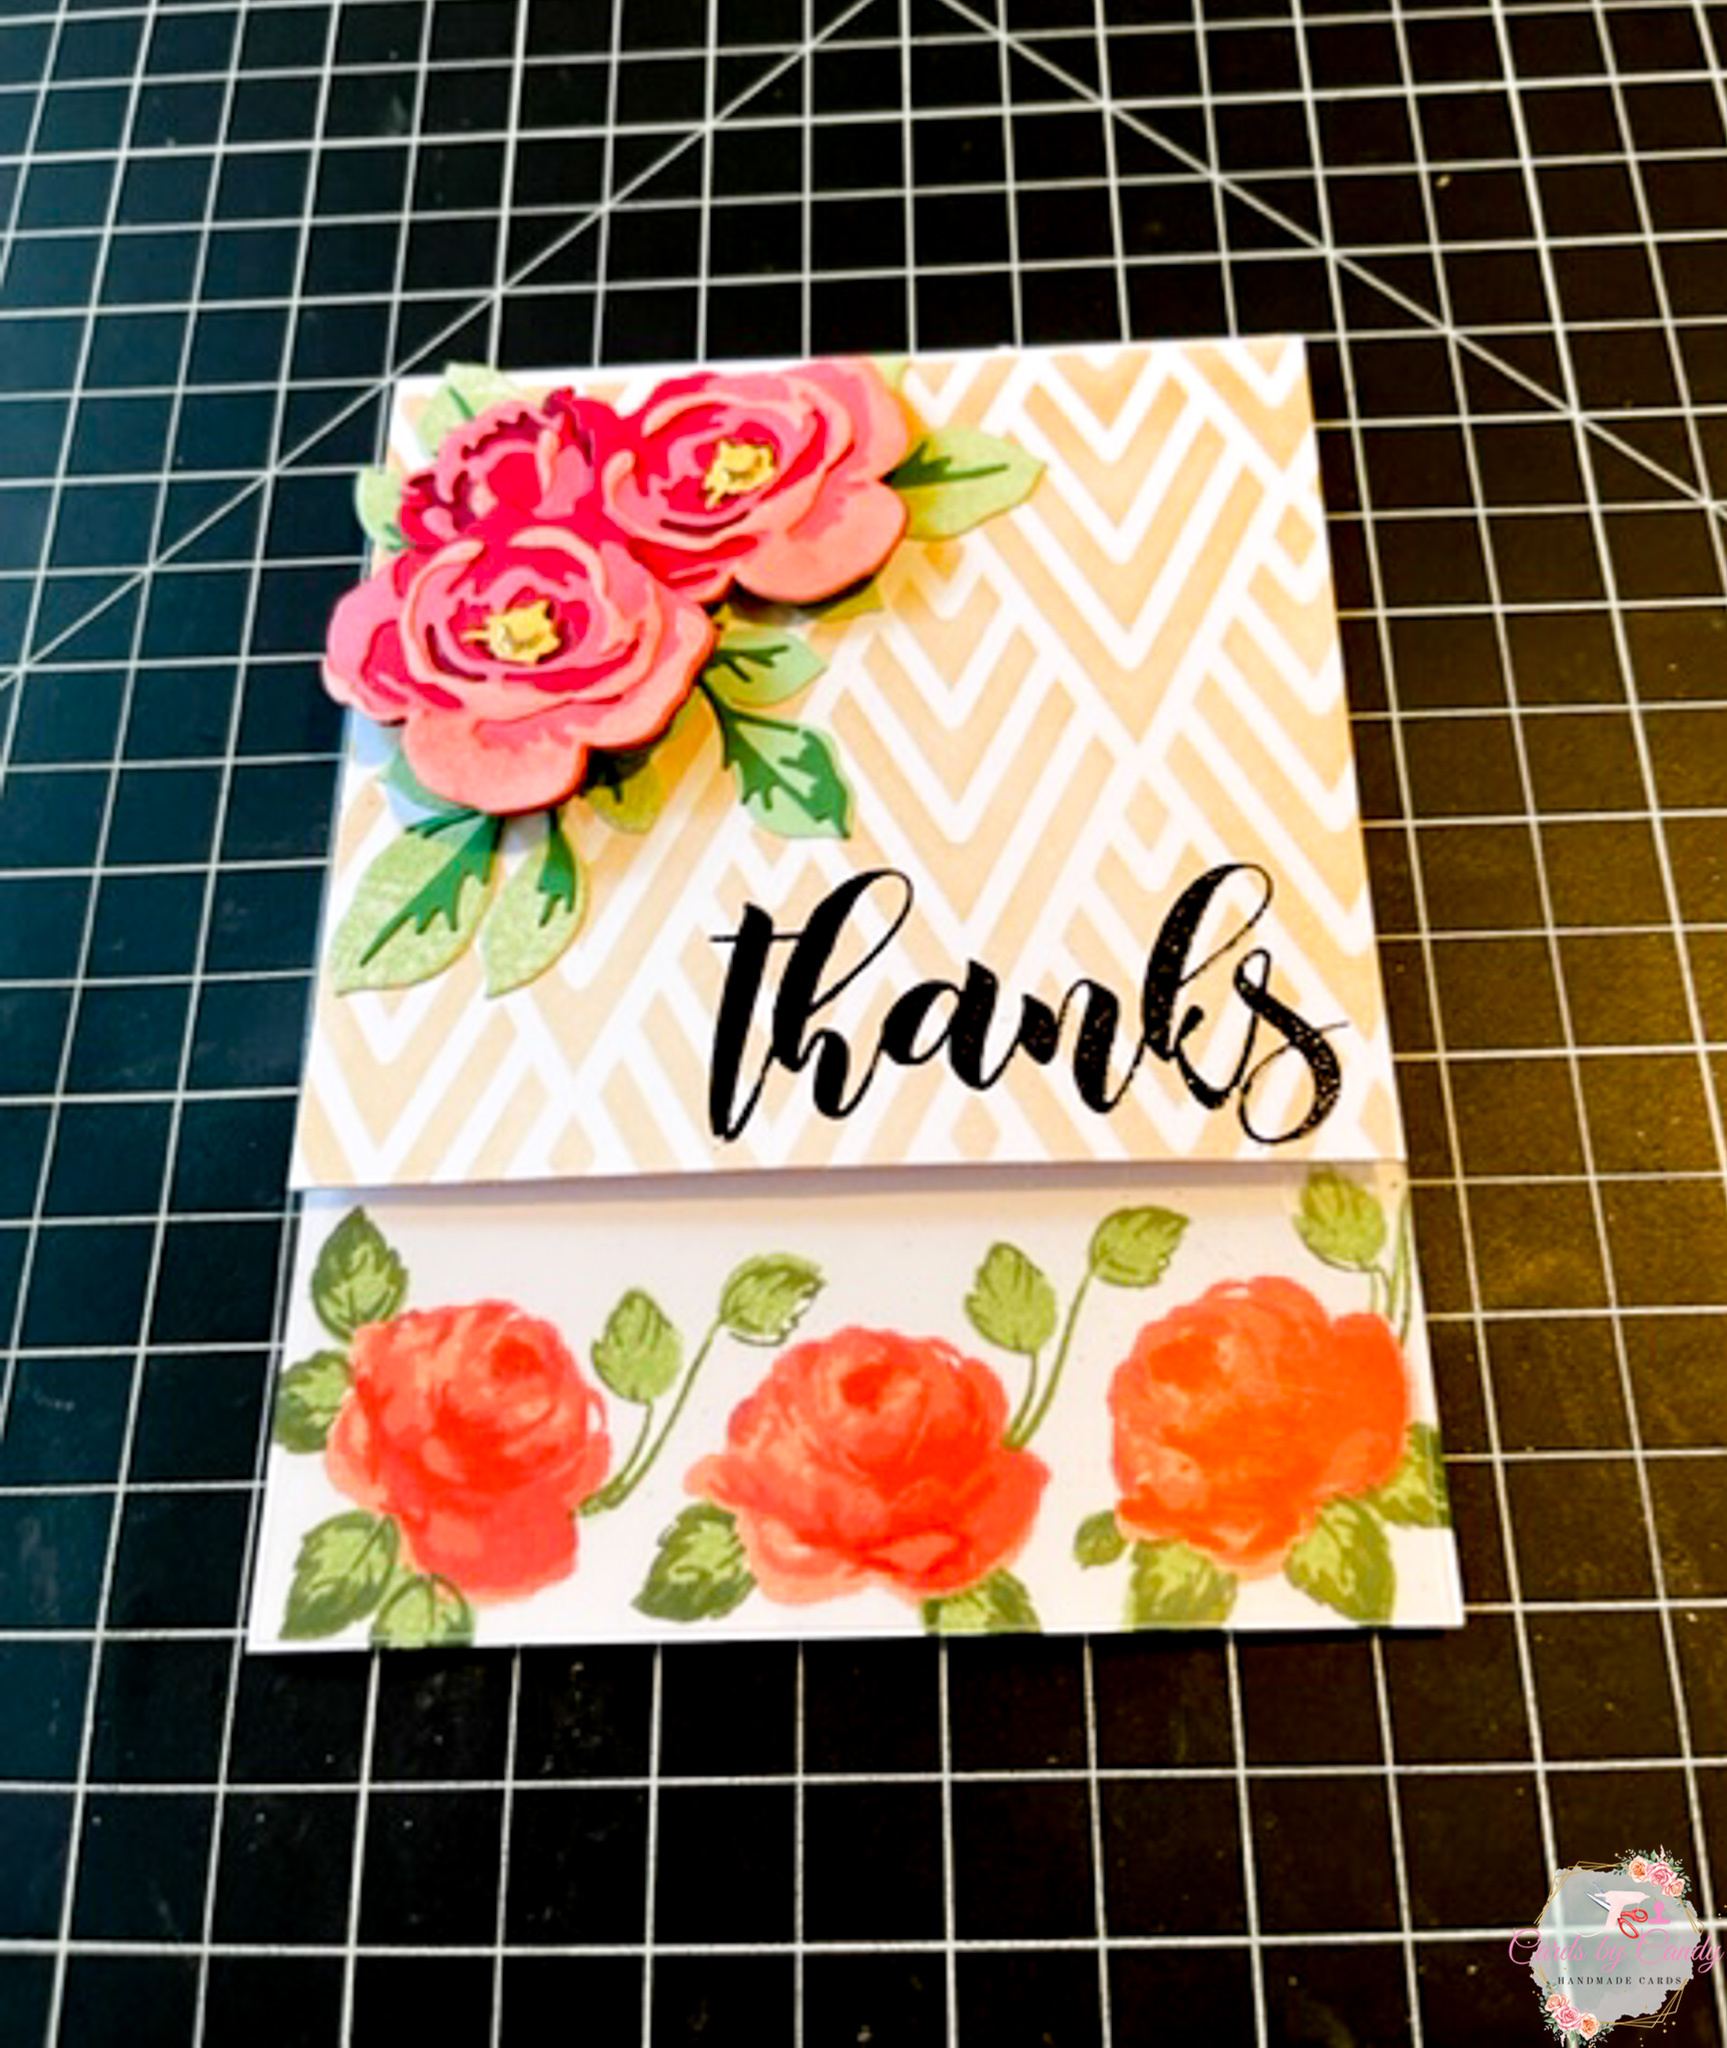

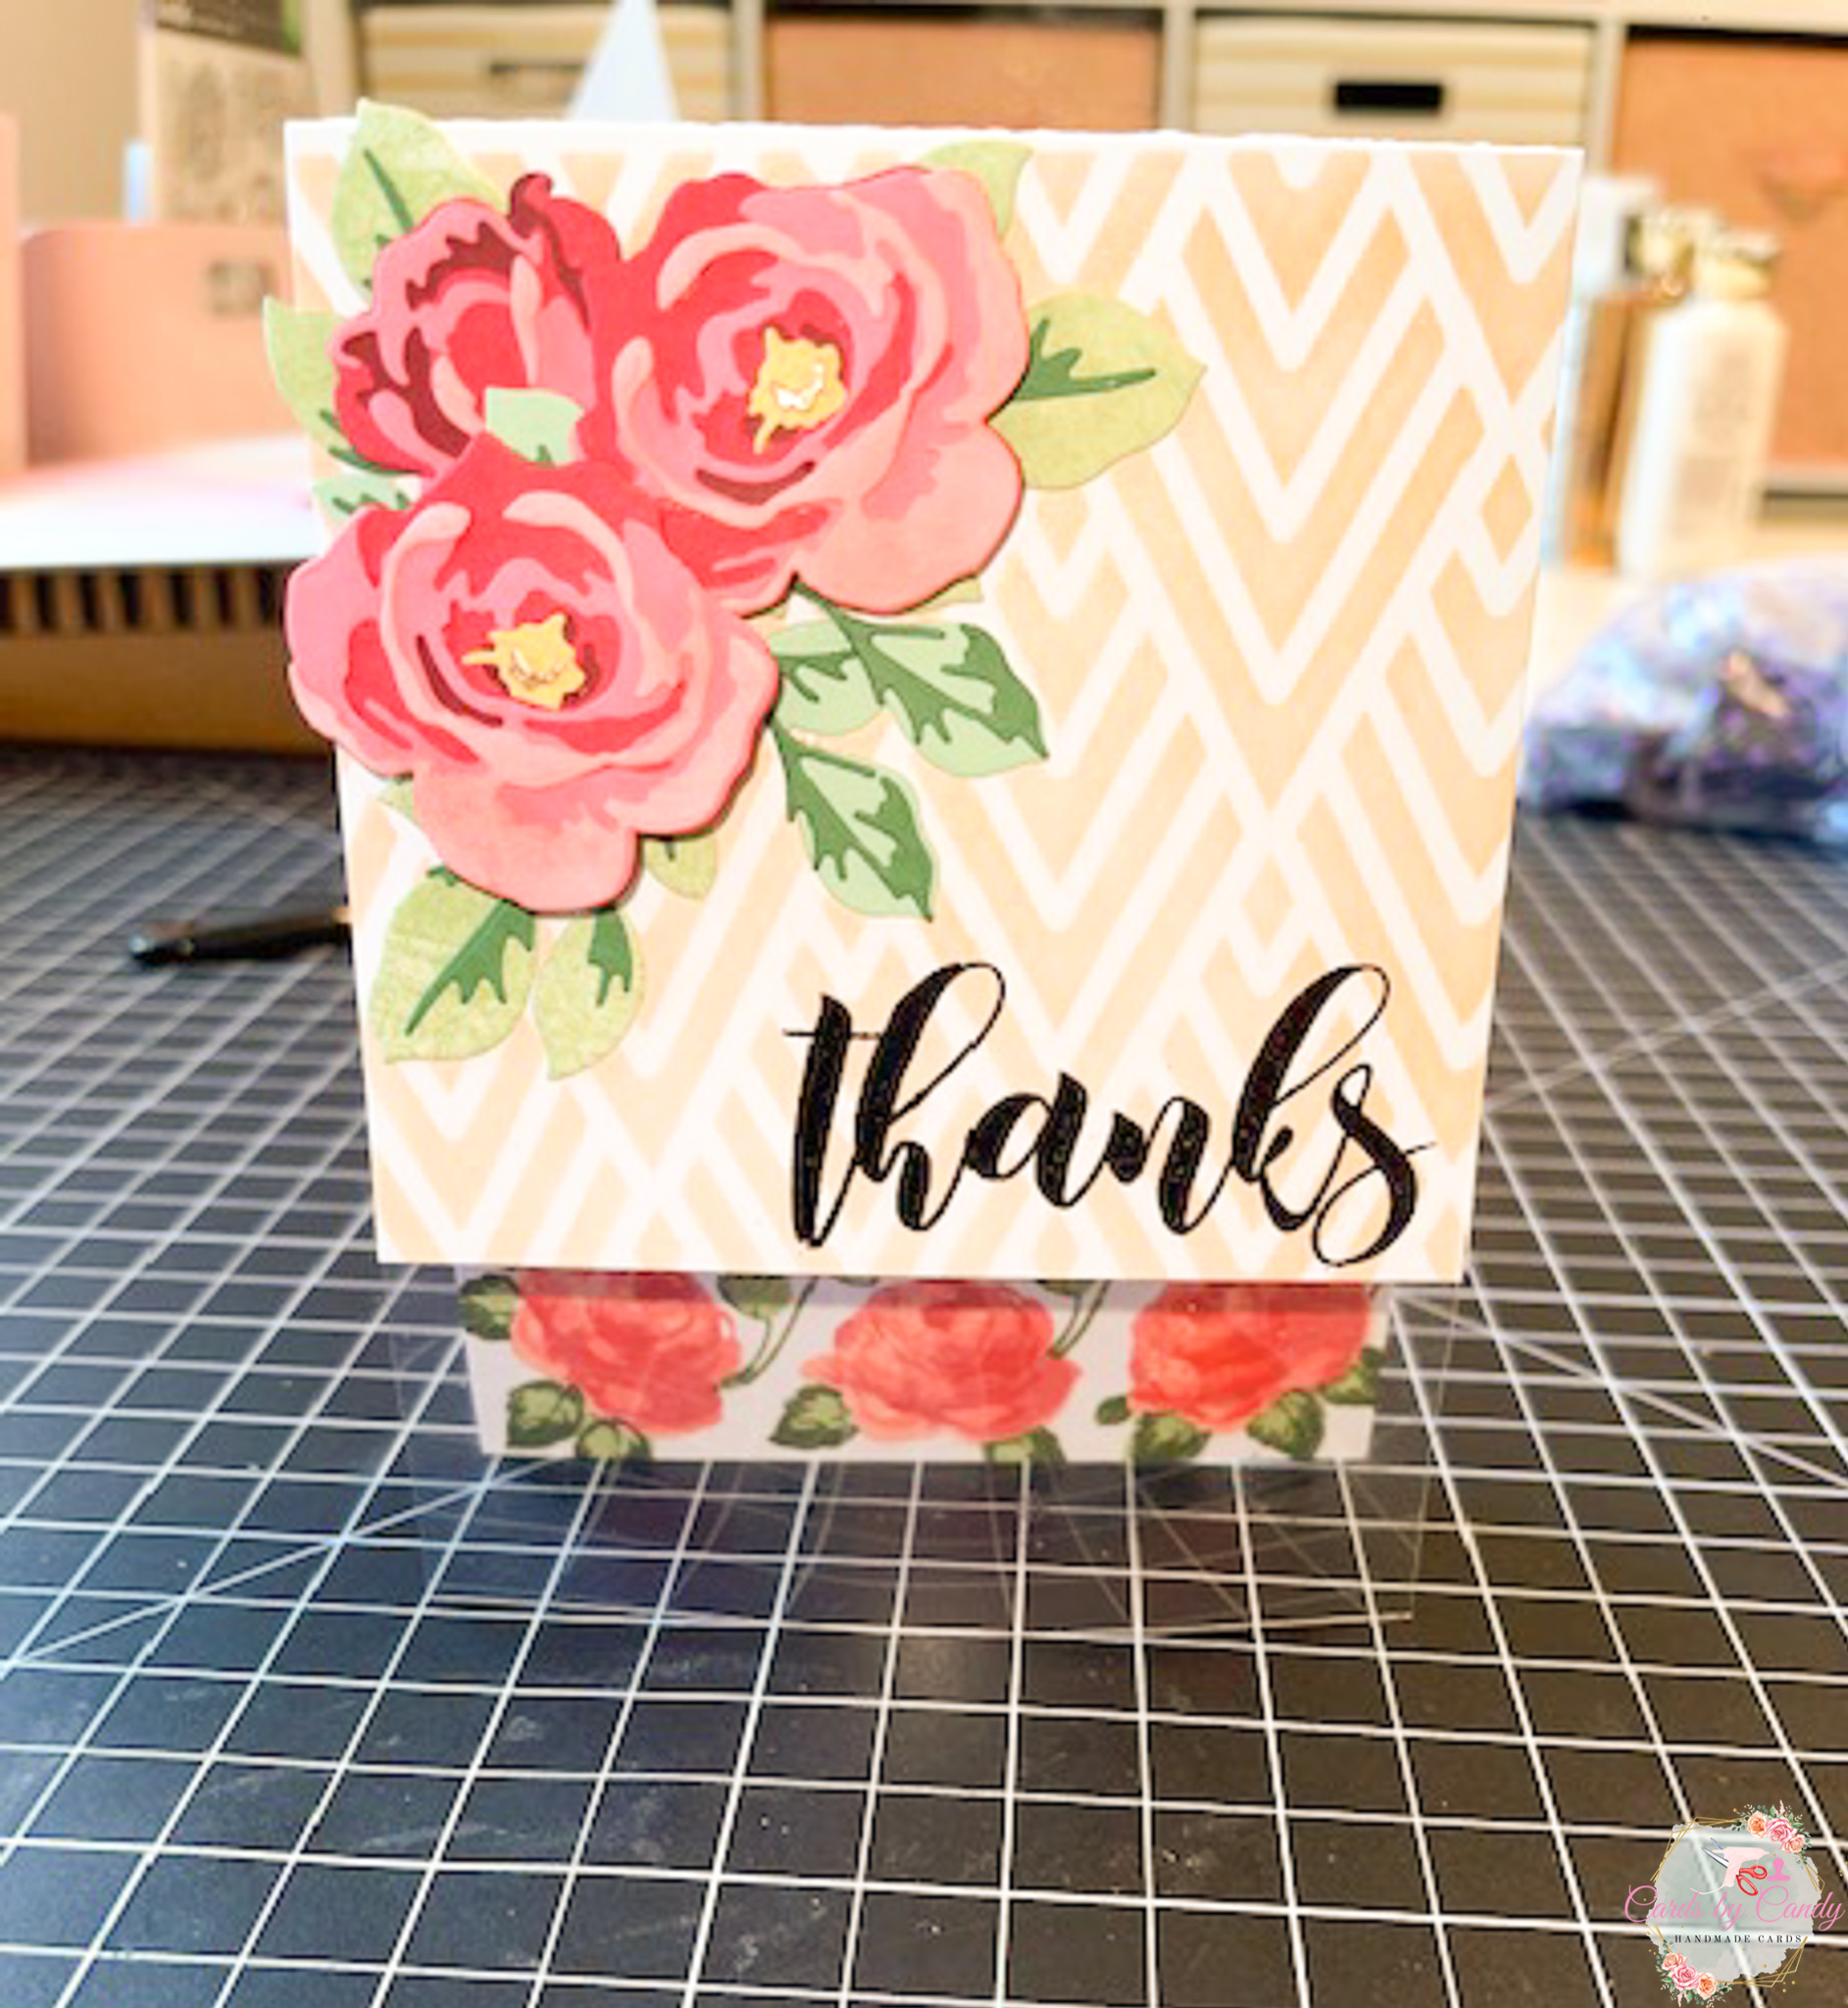
Here is a look at the completed card. I am loving how this card turned out!! Let me know what you think in the comments. I’d love to see how you use this die set to create 3D layers using dies.


Interesting layout! Love the photography, Candy!! The card just pops! Thankyou for submitting your wonderful work to the AECP assignment gallery.
Thank you!