


Hello everyone! Welcome back to more crafting! So thankful you have joined me again! This post is all about completing my Altenew Educator Program Level 2 Challenge. I’m breaking this into two parts so that it is not too long. If you are a crafter, whether seasoned or just beginning, joining the AECP program will help to challenge and grow you with your crafting skills and techniques. The info gained from these courses is worth it! Let’s get into the challenge.
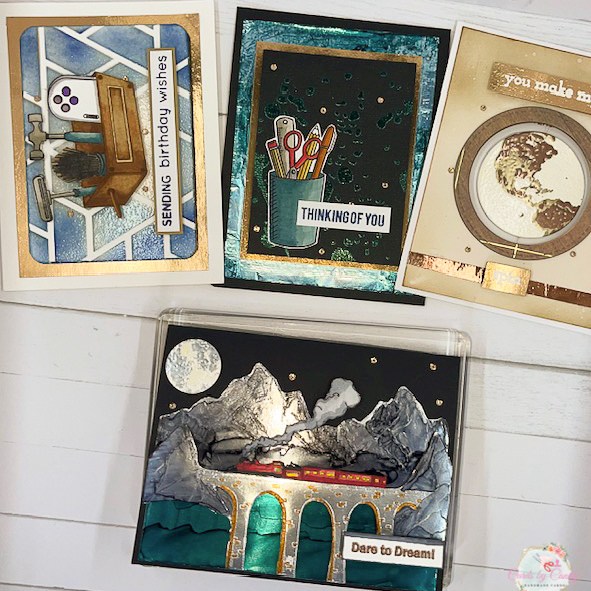
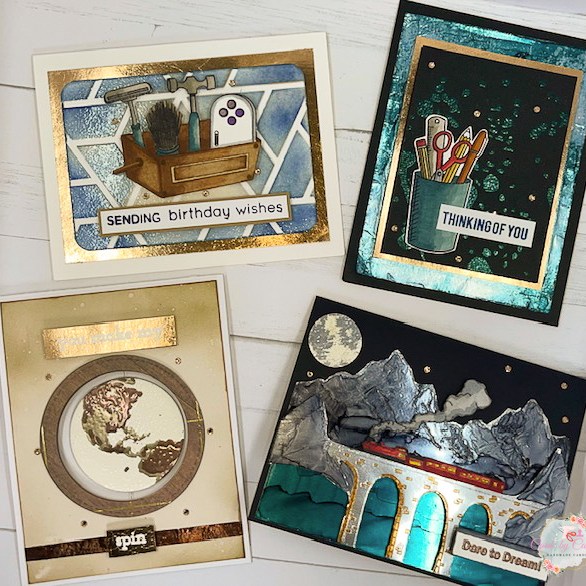
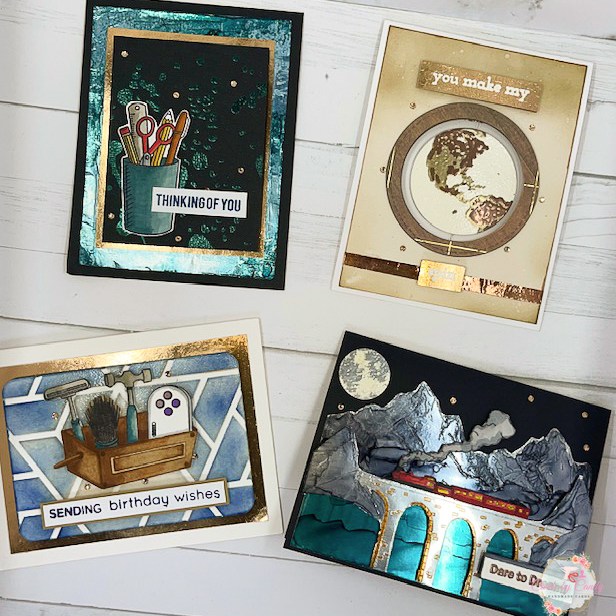
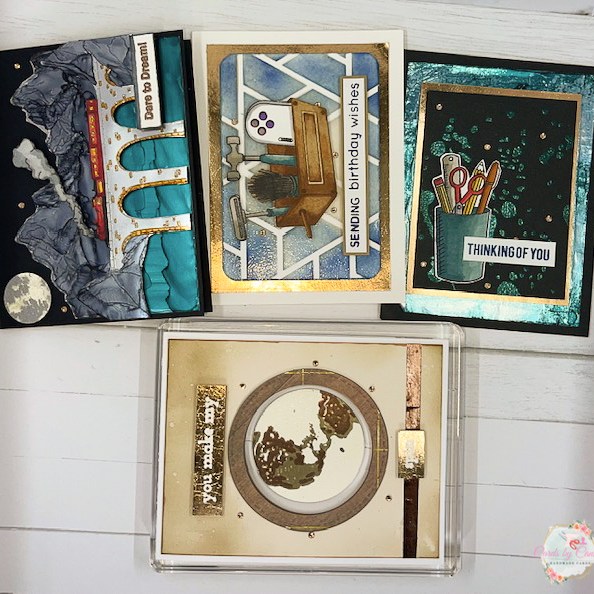
For the first part of the challenge, I had to create four masculine cards with the themes of birthday, thinking of you, love or anniversary, and encouragement. Also, I had to choose three different classes from a combination of Level 1 and Level 2 as my focus for these cards. I chose Impressive Heat Embossing, Magical Marker Techniques, and Let It Shine. You’ll see I also used elements from the Ink Blending, Celebration Stencil Techniques, and Masking Unleashed lessons. As I mentioned before, creating masculine cards are a challenge for me because I gravitate towards the flowers, frills, and pearls. But once I completed these cards, I was very pleased with how each one turned out.
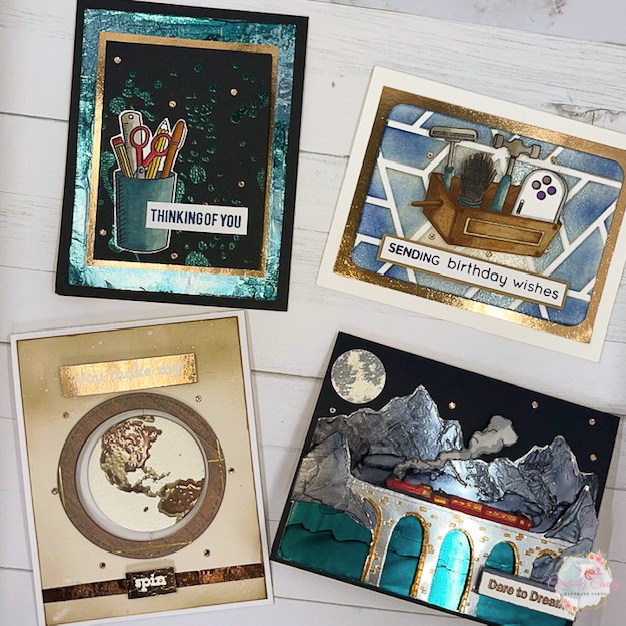

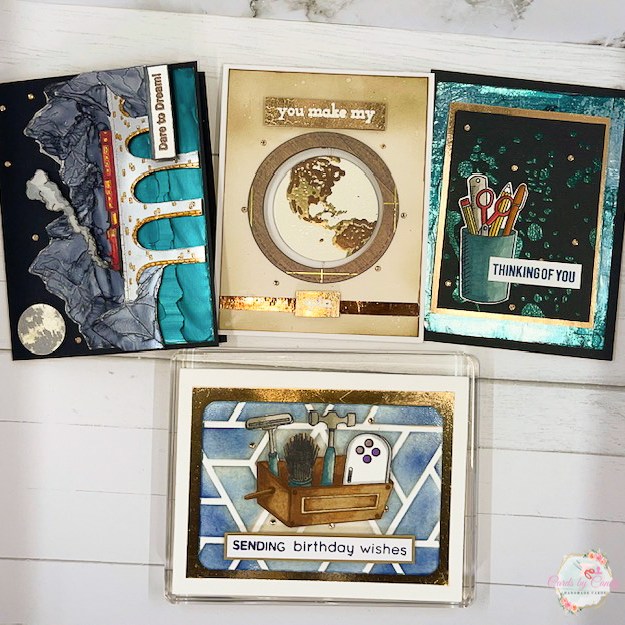


The first card I made was a Happy Anniversary spinner card. Recently, I received the Altenew Big World Stamp set as a gift and knew I definitely wanted to use this for one of the cards. I love a spinner card, so this was the perfect combination. Here are the steps to create this card:
- Cut a top folding heavyweight cardstock base to 4 1/4″ by 5 1/2″.
- Cut a light sand cardstock panel to 4″ by 5 1/4″.
- Using a blending brush, gently blend Stampin’ Up! Soft Suede ink over edges of panel. Continue blending around the top and bottom portions of the panel.
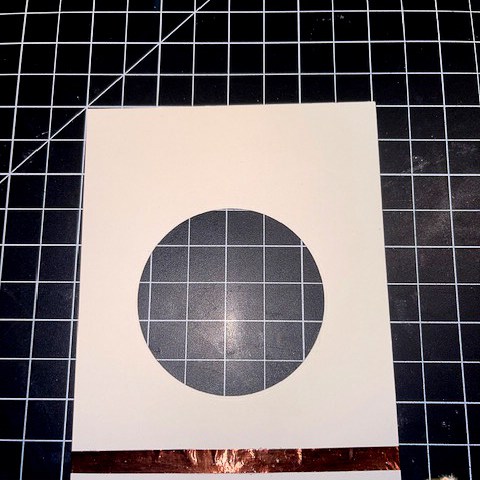
- Die cut larger circle in the middle of the ink blended panel. Placing this die cut panel on top of the card base, trace the circle to be able to die cut from the card base to allow space for the spinner feature.
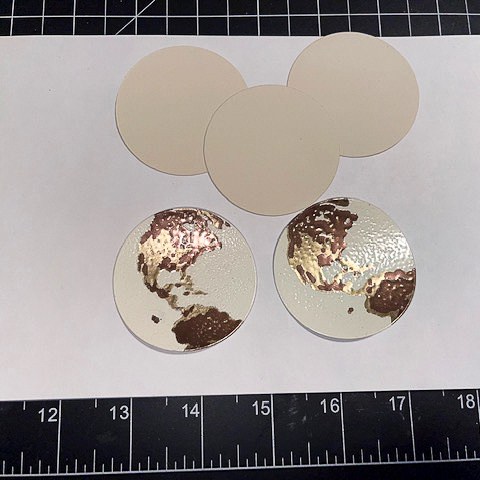
- Take a cream colored cardstock and punch out four 2″ circles.
- Take two of the circles and dust with antistatic powder.
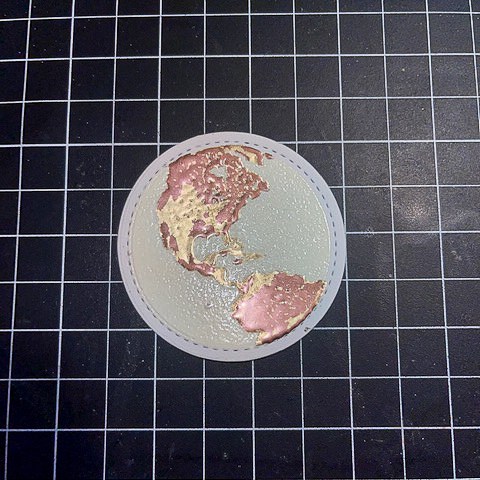
- Using Versamark ink, stamp the solid globe layer. Pour cream embossing powder over the solid image and heat emboss. Make sure to use antistatic powder between each embossed layer.
- Use Versamark ink, stamp the first land layer. Pour champagne embossing powder over the land image and heat emboss.
- For the last land layer, stamp with Versamark ink, then pour bronze embossing powder over the image and heat set.
- Repeat steps 7-9 for the second circle in order to have the exact same embossed image twice. Die cut the two globes and the two blank circles using the Altenew Big World Circle Die.
- Glue one of the globe images to one of the blank circles. Glue the other globe image to the remaining blank circle.
- Take a piece of bronze thread and glue the two globes together making sure they are in the same position.
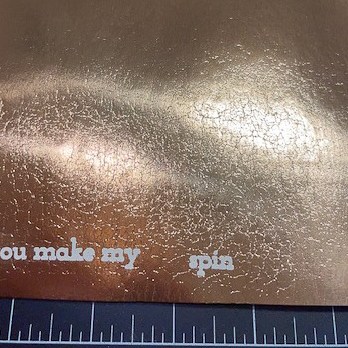
- Taking a bronze scrap cardstock, using Versamark Ink, stamp the sentiments “You make My” and “Spin” from the Altenew Big World stamp set. Pour cream embossing powder of these and heat emboss. You’ll notice the heat creates a leathered and antiqued effect to the bronze cardstock. Cut down the sentiments.
- Next, take a dark tan alcohol marker and color on a small piece of aluminum foil. Spritz with a little bit of alcohol and dab with a paper towel. Cut to a small strip and adhere to the bottom of the ink blended panel using double sided adhesive. Note that when you use aluminum foil, it is better to use double sided tape instead of liquid glue.
- Take a larger infinity circle die and the next smaller size circle die and tape these together. This will create a ring to go around the circle in the middle. I chose a woodgrain designer paper for the top ring layer. To create dimension, die cut four more rings from brown cardstock.
- Glue the woodgrain ring on top of three brown cardstock rings. On the inside of the card, glue the remaining ring around the circle opening.
- Taking the ink blended panel, glue the globes with the bronze thread to the back of the panel. Add extra adhesive to the back of the panel, then glue this down to the card base to keep the thread trapped between the two layers.
- Glue the woodgrain ring around the front of the card circle opening.
- Using dimensional foam tape, adhere the “You Make My” sentiment above the circle on the front of the card. Then, adhere the “Spin” sentiment in the middle of the aluminum foil strip below the circle.
- Complete by adding a few bronze gems to accent the spinner feature. Tap the globe and watch it spin!
- For the inside of the card, I used the Altenew Pattern Play: Diamond stamp set at the bottom of the card. Do a 2nd generation stamp the solid diamond image twice using Altenew Espresso ink.
- For the top middle of the inside, I used the “Happy” script sentiment from the Altenew Happy Pomegranates stamp set and combined it with the modern “Anniversary” script from the Altenew All the Hearts stamp set. These were inked with Altenew Espresso ink.


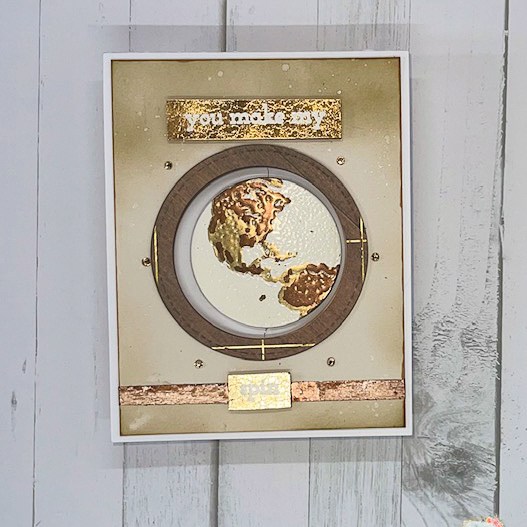
I really loved creating this cute card. It has a wonderful vintage feel and I believe makes a great masculine card! The spinner globe is a great interactive feature for the card.

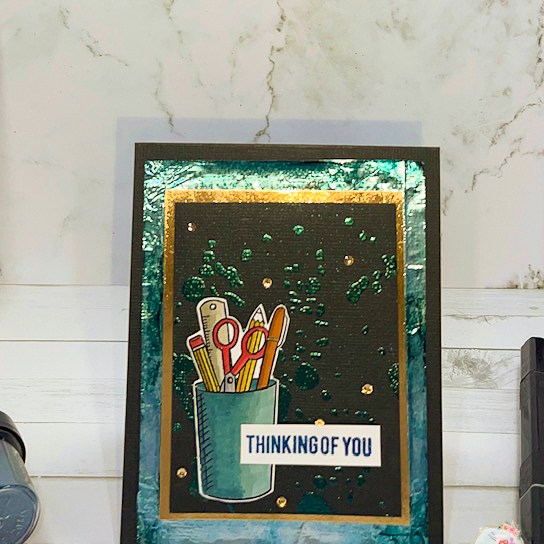
The next card I created was such a fun, easy card to make. I really honed in on the lessons from the Magical Marker Techniques and Let it Shine. I also used heat embossing on this card too. When creating the design, I knew I wanted to use bronze and a deep turquoise color. The bronze helped with adding shine and breaking up the turquoise elements on the card. Let’s jump into these quick steps for this adorable crafty card.
- Cut a top folding 4 1/4″ by 5 1/2″ card base from heavyweight cardstock.
- Cut a piece of aluminum foil to 4″ by 5 1/4″ inches.
- Cut a small bronze cardstock panel to 3 1/2″ by 4 3/4″.
- Cut a small black cardstock accent piece to 3 1/4″ by 4 1/2″.
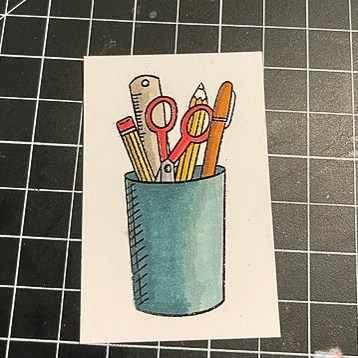
- Using the Altenew Crafting Essentials mini stamp, stamp the image onto white cardstock using Altenew Permanent Black ink.
- Color in cup using Spectrum Noir Alcohol Markers in BT9, VB2, and Blender.
- Color in pencils using Spectrum Noir Alcohol Markers in GY1 and GY2.
- Color in ruler using Spectrum Noir Alcohol Markers in BG1 and BG2.
- Color in scissor blades using Spectrum Noir Alcohol markers in IG1 and IG2.
- Color in pen using Spectrum Noir Alcohol markers in TN5 and TN6.
- Color in eraser top and scissor handles using Spectrum Noir Alcohol markers in CR7 and CR8.
- Fussy cut image – or use the Altenew coordinating Crafting Essentials Die.
- Take aluminum foil and color over it with an Spectrum Noir Alcohol marker in BT9. Set to the side to dry for about a minute, then spritz with alcohol. Use paper towel to dab away excess and to create texture on the aluminum foil.
- Using double-sided tape, adhere the aluminum foil panel to the card base.
- Using double-sided tape, adhere the bronze cardstock panel on top of the colored aluminum foil.
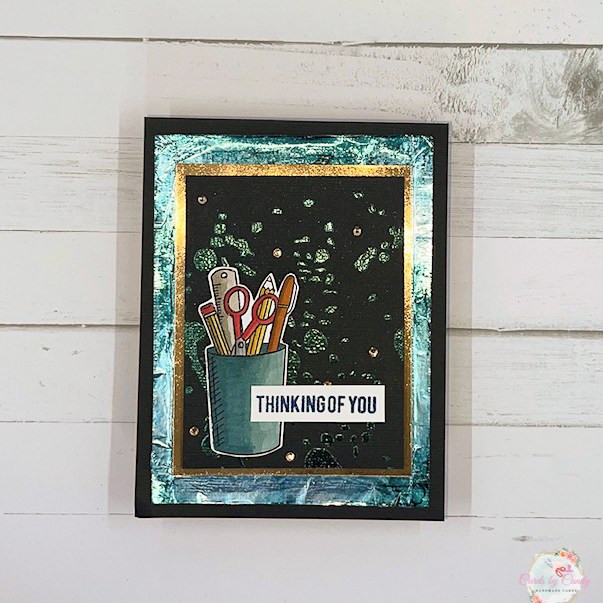
- Take previously cut small black cardstock piece and rub antistatic powder over it.
- Using Altenew Splatter Stencil, tape it on top of the small cardstock. Using a domed blender, rub Versamark Ink over the stencil and open portion of cardstock.
- Remove stencil, then pour metallic teal embossing powder over stencil image. Heat set to emboss.
- On the back of this stenciled piece, use crafter’s thick foam for dimension. I ran a black magic marker around the edges of my foam cut piece so that it would keep consistent with the darker theme. Adhere on top of the bronze cardstock panel.
- Taking the art cup image, place black foam dimensional tape on the back and pop it to the left side on top of the smaller splattered cardstock piece.
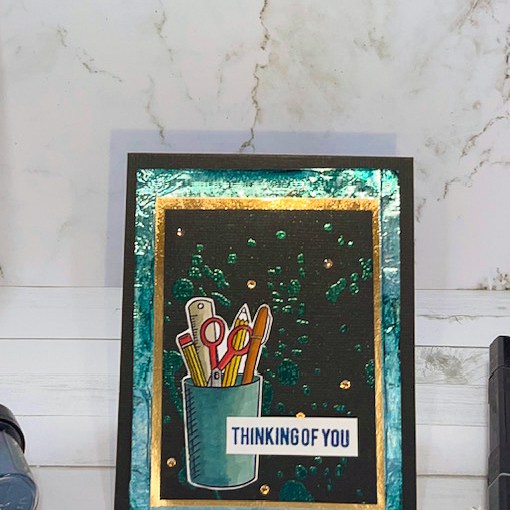
- Stamp the modern font “Thinking of You” sentiment from the Altenew Thinking of You stamp set using Altenew Desert Night ink.
- Whilst the sentiment ink is still wet, pour clear embossing powder over it and heat set it to make it slightly darker and to give it shine.
- Place the sentiment partially on top of art cup.
- Add bronze gems to accent.


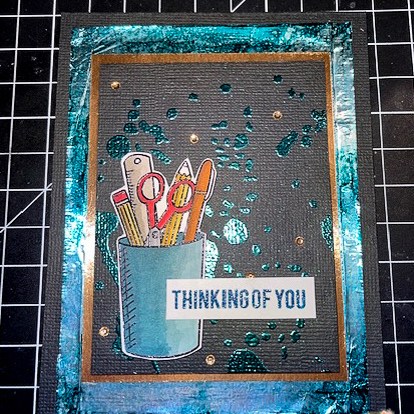

As you’ll see, this was a very easy card to make. The longest part of creating it was coloring in the art image. I am really loving the use of using an alcohol marker on aluminum foil. From the class, it suggest thin metal sheets, but I wanted to challenge myself with the aluminum foil. This adds such a wonderful metallic backdrop behind the alcohol marker. If you are wanting to try a new trick on your cards, really think about using the alcohol marker technique on aluminum foil!
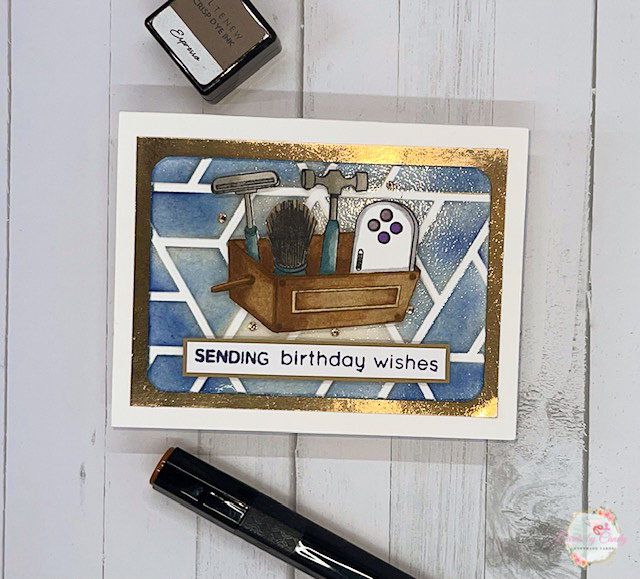
For my third card, I wanted it to be simple, but I wanted to use this really nifty Altenew Best Dad stamp set. It is perfect for a masculine card! From one of the lessons, I learned about Masking Unleashed where we take our masking to the next level. The hardest part of this card was getting the masking pieces done correctly. It took me three tries, but I got it! Also in this card, I feature elements from Magical Marker Techniques, Ink Blending, Let It Shine, and Celebration Stencil Techniques.
- Cut a card base to 4 1/4″ by 5 1/2″.
- Cut a bronze cardstock panel to 4″ by 5 1/4″. Using double-sided tape, adhere this to the card base.
- Cut a smaller cardstock panel to 3 3/4″ by 5″.
- Using the Altenew Color Block Triangle Stencil, tape this to the top of the small panel. Taking an ink blending brush, blend Altenew Sand Dunes ink over the stencil for the first layer. Next, blend Altenew Tanzanite ink over the stenciled first layer around the majority of the card and over all the edges, leaving the center portion to show the Sand Dunes ink color. By leaving the Sand Dunes color showing, it will give a bronze glow beneath the Tanzanite.
- Next, using a domed blender, rub Versamark ink for the third layer. Remove the stencil and pour clear embossing powder on top of the stenciled image. Heat set to emboss.
- Taking a corner rounder or the opposite side of an envelope punch board, round all four corners of the stenciled panel.
- To keep the deep blue reflected around the rounded panel, take Spectrum Noir TB9 alcohol marker on the chiseled edge and run it around the edges of the panel.
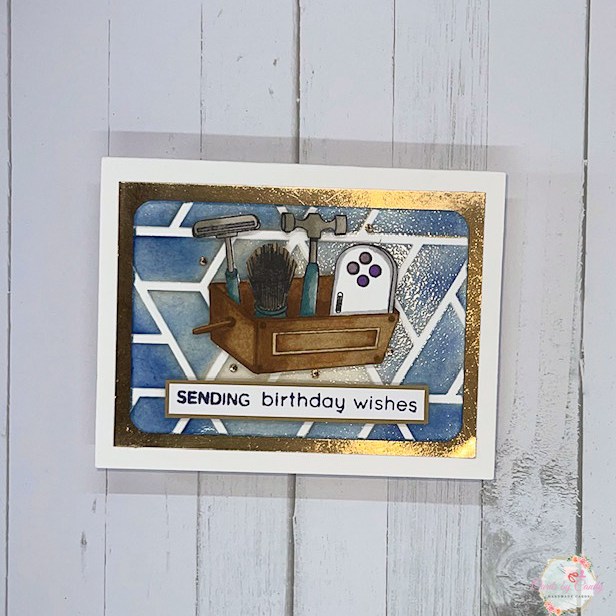
- Using thick foam dimensional tape, adhere the rounded panel on top of the bronze panel.
- For the sentiment, I used two different Altenew stamp sets. For the “Sending’ in the all caps modern font, I used the Altenew All the Hearts Stamp set. For the “Birthday Wishes” in a rounded font – to go with the rounded corners of the stenciled image – I used the Altenew Stained Glass stamp set. I placed these in a straight line on a clear acrylic block and inked it with Altenew Tanzanite ink, then stamped the full sentiment onto a small white cardstock strip.
- Cut down the sentiment strip and then cut a slightly larger layering strip from kraft cardstock. Glue or tape the sentiment on top of the kraft cardstock strip.
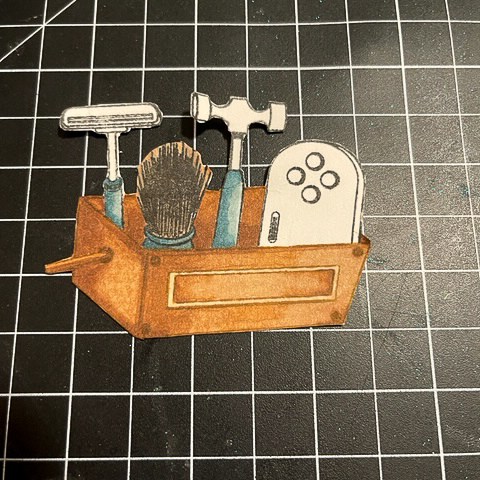
- Now is the time for the masking! All images from the bucket to contents in it came from the Altenew Best Dad stamp set. Stamp the bucket image onto masking paper. Cut out the top opening of the bucket masking paper image. This will allow for items to appear as if they are in the bucket.
- Using Altenew Espresso Ink, ink the bottom of the bucket, along with only the left line of the top of the bucket. Do NOT ink the long horizontal top line or the right line of the bucket. Stamp this image onto white cardstock.
- On masking paper, stamp the razor, the shave brush, the hammer, and the controller. Cut out each of these masking pieces.
- Take the masking paper bucket image and place it directly on top of the stamped bucket image to cover it.
- Line up the razor, the shave brush, the hammer, and the controller onto an acrylic block or onto a MISTI stamp tool. Ink images with StazOn black ink. Stamp on top of masked bucket image and cardstock.
- Leaving bucket mask still on the cardstock, place the cut out masking paper images of the razor, brush, hammer, and controller and place on top of these images. Now take the bucket stamp and ink ONLY the back horizontal line and the right line in Altenew Espresso ink.
- As you remove the masking paper, you will see that the lines are exactly where they need to be and the items appear as if they are inside of the bucket.
- Fussy cut the full image to prepare for coloring.
- Using Spectrum Noir Alcohol markers, color the bucket with MB1, TN3, TN5, and TN6. Go back over the ink using MB1 to lighten out the darker shades and to blend.
- Color the tip of the brush part using TN3 alcohol marker.
- For the base of razor, the base of the brush, and the base of the hammer, use VB2 and BT9 alcohol markers. Go back over with VB2 to blend and lighten. For the top portion of the razor and hammer, use BG1 and BG2.
- For the controller, leave white, but shadow the edges with IG1 and IG2. For the buttons, use LV1 for the lighter color and PL4 for the darker purple buttons.
- Adhere foam dimensional tape behind the bucket image and place onto middle of stenciled background.
- Adhere the sentiment below the bucket image with foam tape.
- Add a few tiny bronze gems for shine.
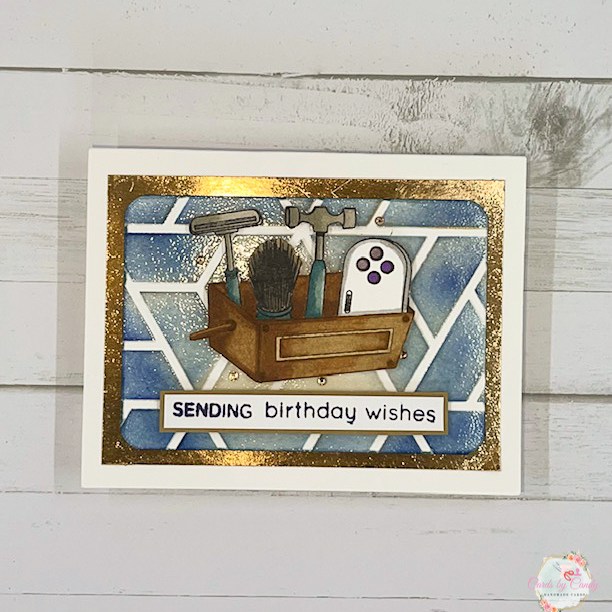


As you can see, other than figuring out the correct placement of the masking paper, this card was very easy to make. It is a great masculine card!
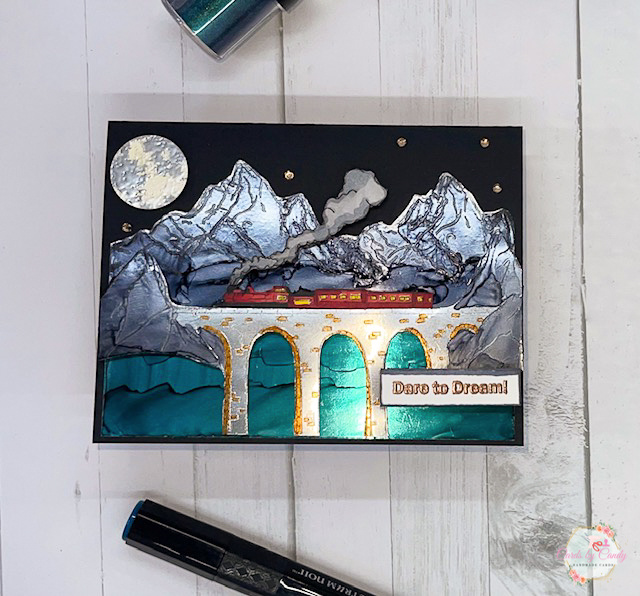
The fourth and final card for this challenge was probably my favorite one. It really sparked my creativity and I was in awe of the completed card. While it looks intricate and difficult, it was quite an easy card to create. For this card, I primarily focused on Magical Marker Techniques, Impressive Heat Embossing, and Let It Shine. Let’s look at the details!
- Cut a card base from heavyweight black cardstock to 4 1/4″ by 5 1/2″.
- Cut out a panel from a thin metal sheet to 4″ by 5 1/4″ and a smaller second panel that it 3″ by 5 1/4″.
- Take a small scrap of cream cardstock. Using the Altenew To the Moon stamp set, stamp the solid moon layer on the cream cardstock using Versamark ink. Pour cream embossing powder over it and heat the embossing powder.
- Rub an antistatic powder over the embossed solid moon image. Using the second moon layer, stamp it on top of the embossed solid layer. Pour pearl embossing powder over it and heat the embossing powder.
- Rub the antistatic powder over the second layer. Using the third moon layer, stamp it on top of the second layer. Por silver embossing powder over it and heat set it.
- Allow the moon to cool between all the heating and then using a 1″ punch, punch out the moon. This will scale it down to fit into the scene of the rest of the card.
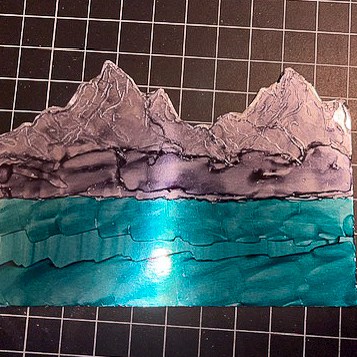
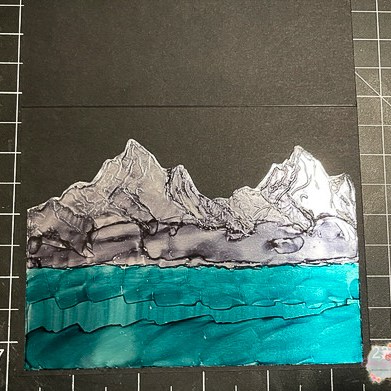
- Take the metal sheet panel that is 4″ by 5 1/4″ and rub antistatic powder over the top portion. Using the Altenew Once Upon a Time Stamp set, stamp the mountain scene once to the left, then slightly overlapping it, stamp once to the right using Versamark ink. This will create a double mountain range.
- Pour silver embossing powder over the stamped mountain image and heat the embossing powder. This embossing powder will cause the lines from the mountain range to have texture once mixed with the alcohol marker.
- Fussy cut the top portion around the mountains. There is a coordinating die for this mountain stamp; however, I fussy cut it since I had stamped the mountain twice, overlapping it in some parts. I did not want the die to mess up the overlapping.
- Take a Spectrum Noir Alcohol Marker in BT9 and color the entire blank bottom portion of the mountain scene. This will create a gorgeous glacier lake look. Allow the alcohol ink to blend all over the bottom of the metal sheet. Go back over it to add a bit more color in areas and to create slight waves.
- Once the lake area is colored, using Spectrum Noir Alcohol marker in IG6, color the mountain range. As the alcohol blends over the embossed area, it creates a rugged texture. Go back over areas where you want to create shadows, such as close to the bottom of the mountains and in some of the faceted grooves. Once finished, set this to the side and let dry.
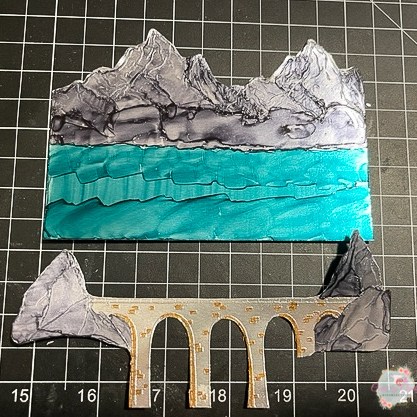
- Next, let’s stamp the bridge scene by taking the other metal panel sheet that was cut to 3″ x 5 1/4″. Rub this small panel with antistatic powder. Using the Altenew Enjoy Your Journey bridge and train stamp, only ink up the two mountains and the bridge using Versamark ink. Try to wipe away any excess ink that got onto the train. We will stamp the train separately. Pour silver embossing powder over the bridge stamp and heat set the embossing powder.
- Color the two small mountains on either side of the bridge using the Spectrum Noir Alcohol marker in IG6. Remember to go over edges that you want to make darker for shadows. Color in the small bricks on the bridge using Spectrum Noir Alcohol marker in TN6. Repeat the coloring over the stones you want darker.
- Fussy cut the bridge image out, including underneath the arches. We want to keep the arches open so that we can see more of the glacier lake once we put the card together.
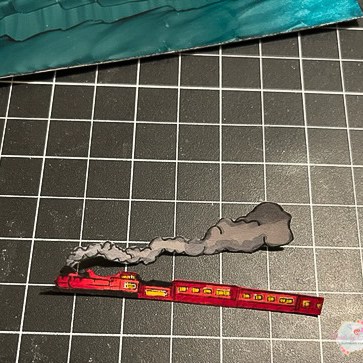
- Taking a small piece of white cardstock, ink up the train from the same bridge stamp. Stamp the train using Altenew Permanent Black ink. To color the train, I used Spectrum Noir Alcohol Markers in CR7, CR8, CR11, DR5 for the red portion of the train. For the lights in the windows, I used CT4. For the smoke plume, I used IG1 and IG2 and completed the roof and bottom wheel portion in True Black.
- Fussy cut the train with smoke.
- On another scrap of white cardstock, stamp the “Dare to Dream!” sentiment from the Altenew Goals mini stamp set using Versamark ink. Pour bronze embossing powder over it and heat set it. Cut around the strip to create a small rectangle. Taking the IG2 alcohol marker on the chiseled edge, color around the edge of the sentiment.
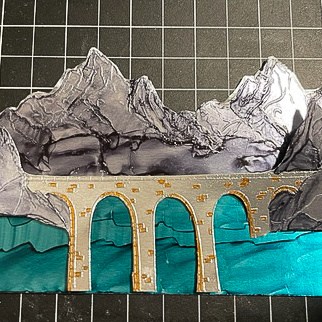
- Let’s assemble the card! Using double-sided tape, adhere the large mountain and glacier lake onto the center of the card base. Press down firmly. Add foam dimensional tap to the back of the bridge image and small mountains. Place it so that the top of the rail will cover the top of the glacier lake line.
- Add foam dimensional tape to the back of the train and the smoke plume. Place the train in the middle of the bridge so that the smoke plume will end up in the shorter part of the back mountain range.
- Use foam dimensional tape to pop up the “Dare to Dream” sentiment to the bottom right, covering the small column of the bridge.
- Add the 1″ moon to the top left corner of the card using foam dimensional tape. Add a few small bronze gems for the stars in the night sky.


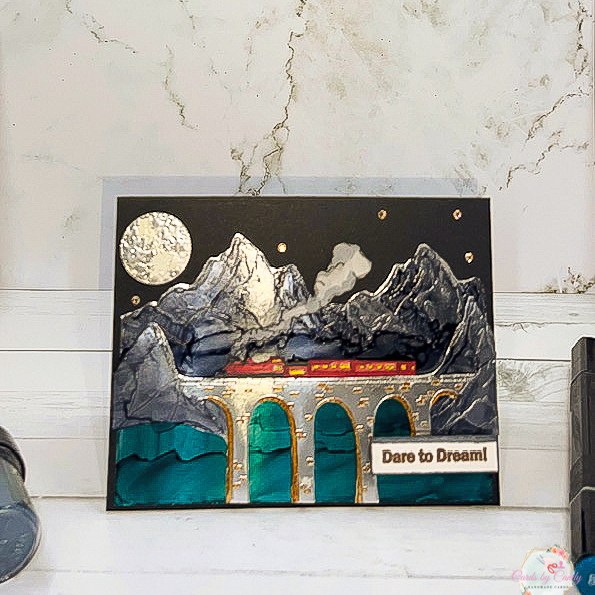
If you could see this card in person, you would notice how the embossed images have so much texture due to the alcohol ink blending over it. This truly is a stunning card and I was very pleased with the outcome. This would make a great encouragement card for any guy!


I’d love to know which was your favorite card from these four. Take the poll below! Thank you again for stopping by! Leave a comment, let me know what you think and stay tuned for Part 2 of this challenge coming soon!
My favorite card was the mountain and train scene. I loved all of these cards.
Thank you so much! It was a fun card to make!
WOW!!! you blew me away with these cards, Candy!!! I love them!! So cool. These are absolutely perfect!
Thank you so much, Erum! This means so much for you to say that!