
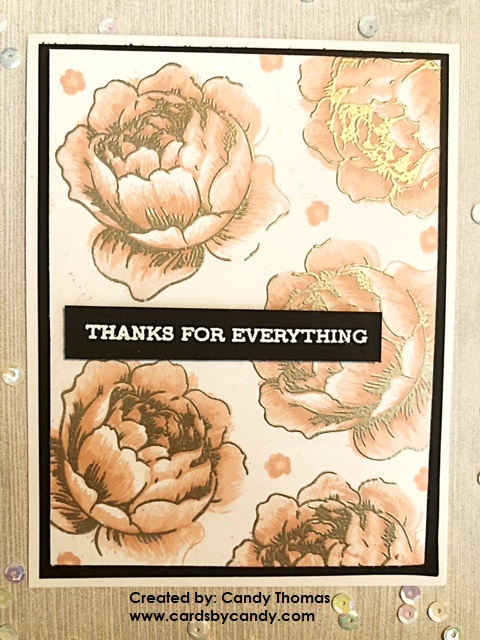
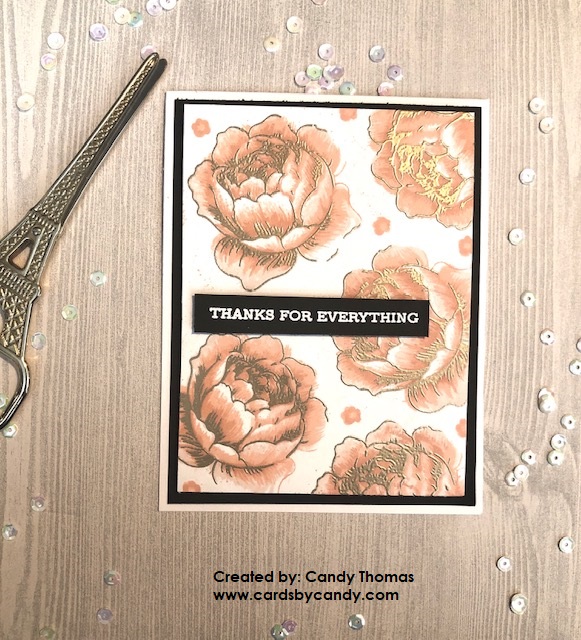

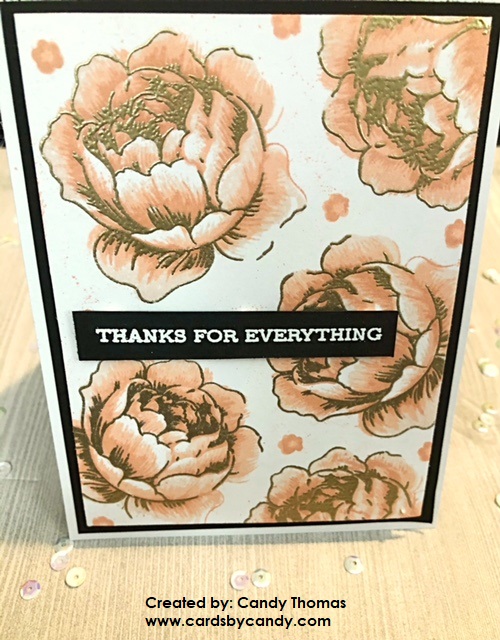
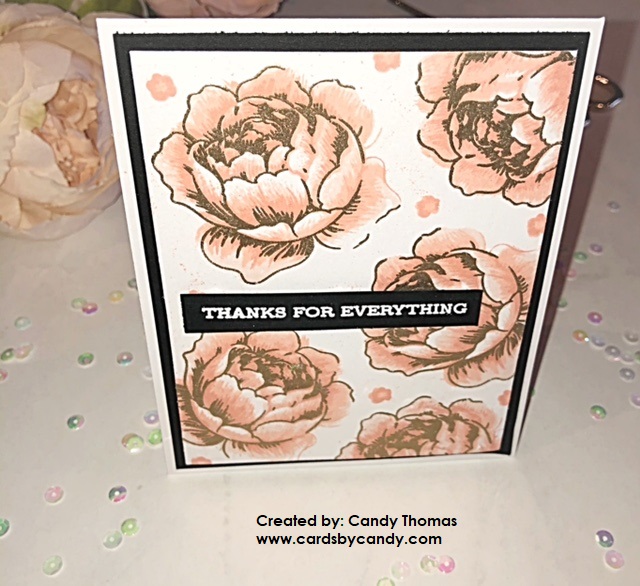
Layering Rose Blossoms with Champagne Embossing Powder
Have you used any of the layering flowers yet? If you have been stamping for a while, more than likely you have dabbled with different layering stamp sets. One of my favorite stamp sets is the Altenew Rose Blossoms layering stamps. The Rose Blossoms stamps also have matching dies available. In this sample, I used only the rose blossom stamp; however, the stamp set comes with layering leaves. I loved the outcome of it with the champagne embossing powder.
I started by rubbing an antistatic embossing pouch on a 3 3/4 inch x 5 inch panel. I used Versamark ink to stamp the first outline layer on the panel. I turned the stamp various ways to create a background effect. Once I finished stamping the rose blossom outlines with Versamark ink, I poured Recollections Champagne Embossing Powder over it. Then, I heat set it using a heat tool. Before applying the other ink layers, I let the embossed outlines cool for a bit.
Next, I used the solid image rose blossom stamp and filled in the outline using Altenew Pink Pearl crisp dye ink. I filled in each embossed outline with the solid image to get the base color. Then, I used the third layer for the shadows and stamped it in Altenew Rouge crisp dye ink. This gave a beautiful tone and accented the solid image and the embossed outline very well. For the fourth layer and final layer, I stamped it using Altenew Coral Bliss crisp dye ink. These combined four layers create a beautiful realistic rose blossom. In between the large rose blossoms, I stamped the small flower images from the Altenew Rose Blossom stamp set. It comes with a tiny solid image, which I stamped using Altenew Pink Pearl ink and the tiny detail image I stamped over the solid using Altenew Rouge ink. These pretty little flowers made it feel complete.
To complete the card, I attached the decorated panel to a 4 x 5 1/4 black cardstock mat and glued it using Gina K Connect Glue to the 130lb heavyweight cardstock base. The card base is the standard 4 1/4 x 5 1/2 inches. For the sentiment, I used the Altenew Sentiment Strips stamp set. I cut a small strip of the black cardstock and stamped it using Versamark ink and then used Ranger White Embossing Powder to make it pop against the black strip. I popped it up to give dimension using small dimensional dots.
I enjoyed creating this card showing the layering technique from my Altenew Educator Certification Program class. I love seeing how these stamps work together to give a very realistic flower. If you have any questions on using layering stamps, please feel free to reach out to me. I do like using the Altenew layering guide that comes with each of the layering stamp sets.
Which Altenew products do you have on hand to create a similar card?


Tip: try not to crop too close to the project, leave some room around the project so the eyes have some area to adjust and rest on. Go through the photography guidelines provided to you for your benefit 🙂
The embossing looks great and I am sure looks very lovely in person. The layering is so spot on and I love the color you have chosen!
Thank you for submitting your wonderful work to the AECP assignment gallery.
Thank you so much! I will work on that! 😊