


I love using stencils on projects! Stencils are a cost-effective way to create beautiful cards. For this project, I learned from an Altenew class how to take stencils to the next level. I created these two different cards by stacking different stencils. Let’s get into how I made these.
For the first card panel, I layered the Altenew Mega Rose Stencil and the Altenew Leopard Print Stencils. Here is how I created this card background.
- Tape Altenew Mega Rose Stencil onto panel.
- Blend Stampin’ Up Lovely Lipstick ink over entire stenciled panel.
- In the middle portion and a majority of the petals, blend Stampin’ Up Real Red ink.
- Blend Stampin’ Up Cherry Cobbler ink over middle and a few of the petals.
- Blend Stampin’ Up Merry Merlot ink over middle of rose.


By blending the ink from light to dark, you are creating a layered look by using stencils. Any inks would work. Altenew has some great red inks, but I had these Stampin’ Up inks beside me, so I used those. Now, we will add the leopard print.
- Leaving the mega rose stencil in place, tape the leopard stencil directly on top.
- Blend Delicata Gold Pigment ink over it.
- Next blend Altenew Dark Night ink on top of the gold pigment ink.
- Take up both stencils to see the finished look.
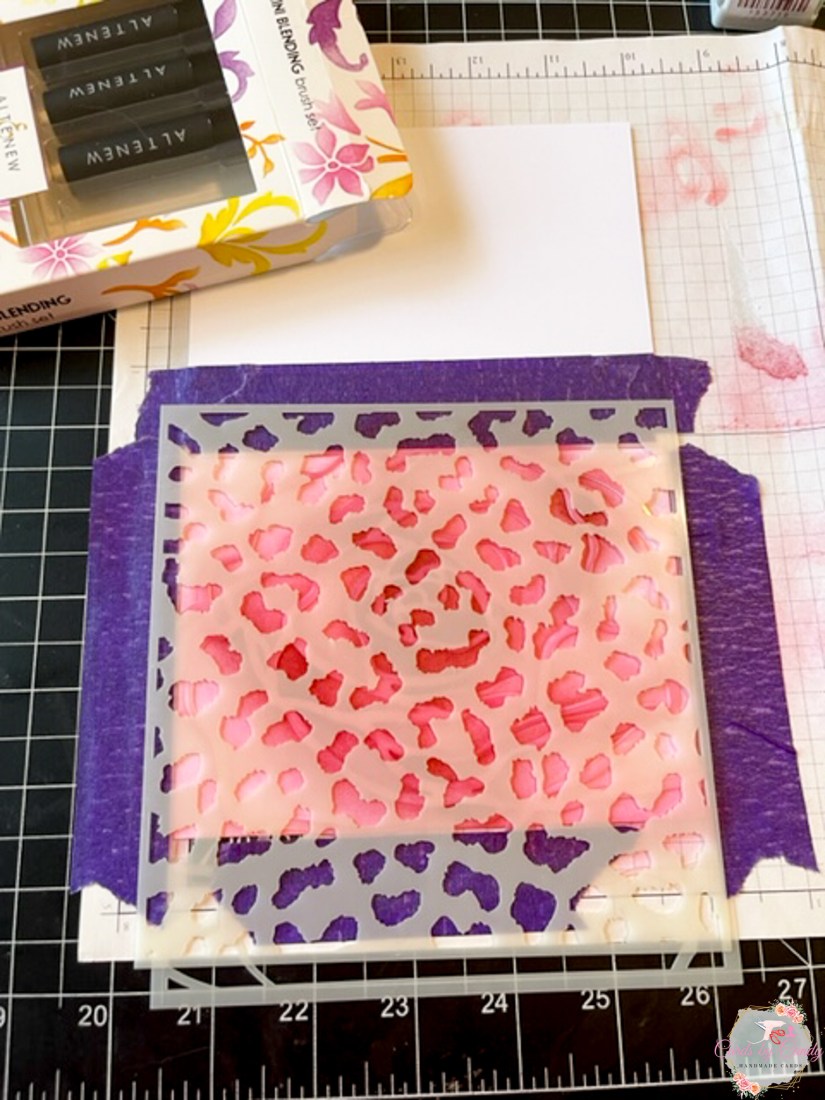


Originally, I had planned to have the leopard print in only the gold; however, on top of the red inks, it almost looked orange instead of gold. I added the gray ink on top of it and when you tilt the card in the light, you will see the gold shimmer. It’s really important to leave the first stencil in place so that the second stencil will not overshadow the first stencil.
To give this panel more interest, I added a light pink and gold ribbon at the bottom and rounded the corners. Adding foam tape to the back, I popped it up on top of a beige/gold mat, then adhered it to a black card base using 130lb black cardstock. I finished this card by adding a few bronze sequins and some Altenew 3D Garden Picks leaf die cuts I had already created.


For the second card, l did a different stenciling technique, but it turned out really cute! I made this adorable baby birthday card. This technique takes a stenciled background and with the second stencil, you create a silhouette on top of the background using embossing powder or ink. I chose to use embossing powder. For the background stencil, I used the Altenew Trellis Stencil and blended ink in a diagonal pastel rainbow using Altenew inks in Blush, Sunkissed, Lemon Ice, Forest Glades, Sea Glass, and Wisteria.


Next, I followed these steps to create the adorable bear with balloons:
- Use Baby Shower Simple Coloring Stencil and rub Versamark ink over bear head stencil.
- Pour embossing powder over the head and heat set. To begin, I did a silver glitter embossing powder and went back over it with bronze embossing powder.
- Stencil the sweater with Versamark ink and added silver glitter embossing powder.
- Continue stenciling hands and body of bear with Versamark ink. Use bronze embossing powder.
- Using one of the lines, stencil the balloon strings with Versamark ink. For the first line, pour copper shimmer embossing powder over the image and heat set it. I repeated these steps to create other balloon strings in teal shimmer, and purple glitter shimmer embossing powder.
- To create the balloons on top of the lines, ink a balloon from the stencil with Versamark ink and pour copper shimmer embossing powder over it, then heat set it. Repeat this for the teal and purple glitter balloons.
- Add eyes, mouth, and nose with dots on the stencil and white embossing powder.
- Add a bowtie with teal shimmer embossing powder.


The longest part of creating this card is the embossing and fine tuning the powder before heat setting it. Otherwise, this is a simple card to make. I stamped the happy birthday sentiment from the Altenew Craft Your Life Project Kit: Garden Rose Stamp set with Altenew Permanent Jet Black Ink onto a white sentiment strip. I cut out a backing layer from black glitter cardstock and popped this up using craft foam. I adhered it to the side of the bear. I finished this sweet little card with the stars from the Altenew Rock Collection Enamel Dots.


This was a good class to stretch my stencils and get more customized panels and cards. Let me know how you use stencils and if you try this technique, which stencils do you think work well together for these two techniques.
Looks incredible, Candy!
Thank you!